Link to StumbleUpon

Showing posts with label planning. Show all posts

Wednesday, January 8, 2014

Deter Deer with Camouflage Gardening

A deer-proof garden is essentially non-existent, but a highly deer-resistant garden is attainable with a little effort and planning. One key is to practice “camouflage gardening“.

Camouflage gardening is the practice of using plants that animals don’t like to deter them from eating plants that they do like. Camouflage gardening is mostly focused on deterring deer, but can work for rabbits, squirrels, and even dogs and cats with appropriate plantings. I must point out and stress that this deters animals like deer from eating desirable plants, it doesn’t prevent them from eating anything.

Deer exploring my new vegetable garden

Think of it as constructing a castle or defensive military position. The plant you want to protect is in the center of the defensive zone. It’s surrounded by a barrier of deer-resistant plants. For superior defense you layer zones with additional rings of protection. You’re not building walls to protect plants but using plants to protect plants.

There are certain plants that deer, and similarly many other animals, don’t like. Deer tend to avoid plants that are strongly aromatic or bitter tasting, that have a milky or sticky sap, or that have prickly leaves or are tough and hairy. When they encounter these plants they tend to ignore them and move on.

Deer are browsers that amble from plant to plant looking for something they like. If a plant isn’t on their list of favorites, they’ll keep looking for one that is. This assumes that they have an adequate food selection available. When conditions are bad, as in drought years or when habitat is reduced, they’ll eat almost anything to stay alive. In spring pregnant does will eat almost anything.


Deer look everywhere for food
To get the best protection and to help minimize problems during bad years, the outside protective zone, which is the first that deer encounter, would have a plant that is highly resistant to deer. This layer should have plants that are aromatic with an odor that makes them walk away. You create a scent barrier that prevents them from smelling desirable plants. Lavender, mint, salvia, beebalm, rosemary, and cedar are some plants that have a smell deer avoid and are also rarely eaten.


Salvia and yarrow are deterrents

The second layer of protection would include bad-tasting or toxic plants. The idea is that if they wander past or through the first protective zone they’ll come across plants that they don’t want to eat. Holly, juniper, feathergrass, zinnia, and barberry are rarely eaten. Plants like elderberry, poppies, bleeding heart, lobelia, and larkspur can be toxic. When deer encounter these plants they should go in the opposite direction.

A third layer of protection is to offer a suicide zone. This is a grouping of fast-growing plants outside the protected area that are less deer resistant. Honeysuckle, trumpet creeper, morning glory, and clematis are plants that deer will nibble without decimating the plant. Flowers that reseed prolifically fit in here too. Planted strategically, these plants can lead deer away from more desirable beds.

With a simple two-stage protection planting plan, deer will come across your landscape, realize they don’t like the smells and tastes, and keep on walking. If they’re curious or extra hungry, they’ll try nibbling on what they find but if they don’t like it they’ll realize this whole yard isn’t worth their time and effort and will move on to your neighbor’s yard. They never make it to the roses or tulips or young fruit tree that they would devour.

Adding a suicide zone gives them someplace else to go as they walk away from your garden. They may eat a few clematis or morning glory flowers as they avoid the aromas and tastes of the other zones. Asters, petunias, and small sunflowers give them something else to nibble, and will grow back soon.


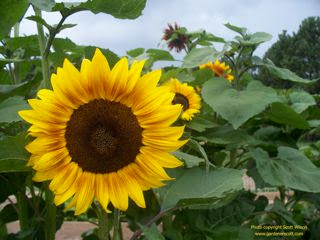
My sunflowers were sacrificial plants

As you plan a camouflage garden you don’t need to think in terms of clearly defined rings of plants. The first and second protective zones can be intermingled, with aromatic plants planted among bitter and toxic ones. The concept is that one plant deters the deer and when they move to a second plant it deters them too. Ideally every plant they encounter within a defined space is a deterrent and they never move through it.

When you have a mix of plants with many deer deterrent properties it creates a synergy where the entire garden becomes highly effective at deterring deer. A wide spectrum of aromatic plants can confuse deer to the point that they seek a more simple, clearly identifiable source of food… like the big expanse of tulips down the street.

To be most effective camouflage gardening needs to be as year-round as possible. If the plant you’re hoping to protect blooms or buds before the others, deer can find it. Your deterrent plants need to be in position and producing their deterring effect.

For example, for early spring your garden border is planted with dwarf juniper, rosemary, sage, or artemisia — plants that are still fragrant even when they’re dormant. A fragrant groundcover like thyme covers the area. A large planting of daffodils, plants deer typically don’t eat, brings early color and helps create another deer deterrent barrier. Irises come next, another plant deer typically don’t eat. At the center of your display for height and color are your tulips, a plant that deer love to devour.

Depending on variety, you may have irises and tulips flowering together which adds extra confusion to the deer. It’s not a perfect solution. In a good year your tulips are spared; in a very bad year everything is eaten.

I’m planting my new landscape with entire beds of deterrent plants. One bed has lavender on one side and various spirea on the other. Miscanthus grass provides height and interest. Purple coneflower and yarrow add color. Apache plume fills the center for added texture color and interest. It’s highly satisfying to see deer tracks in and around the bed and not a single plant is disturbed.
Another bed has creeping phlox, artemisia, dwarf pines, salvia, yucca, columbines, irises, and daffodils; again, there are tracks but no damage. Next year’s new beds will have similar plantings.


A young deer walks away from new beds

We have a resident deer population. They even bed down among the gambel oak trees in our backyard. I’m hoping that they’ll get used to encountering so many plants they don’t like that by the time I plant young trees and a few other less-resistant perennials they’ll have learned to go some place else for breakfast, lunch, and dinner. Already I’ve noticed more tracks walking around my deer-resistant beds than walking through them.


Some neighbors never go away

For your camouflage garden, research deer deterrent plants. You won’t need to sacrifice color, smell, texture, or height. Select plants that you like to grow normally. Then design your beds and landscape with those plants as the first barrier. Continue with plantings of other deer-resistant plants that you want in your landscape. Personalize the space. You don’t need to grow plants you don’t like.

Camouflage gardening isn’t foolproof. The only sure way to protect plants is with a physical barrier. For prized plants and young trees a fence or metal wall is the only sure deer proofing. Used together, camouflage and wire fences can allow plants that deer like to eat to become large enough and established to the point they don’t need a fence.

Camouflage gardening works best in a large landscape or garden with enough space to allow planting the necessary barrier plants, but even in small gardens the same principles can be beneficial. Make plants that deer and other animals avoid your first line of defense. Hide your other plants with smells and tastes that deter deer. With a little planning and a lot of luck you may be able to enjoy plants that you’ve had problems with before.

Check out my video on how to deer proof your garden on my video channel:

https://www.youtube.com/gardenerscott
A deer-proof garden is essentially non-existent, but a highly deer-resistant garden is attainable with a little effort and planning. One key is to practice “camouflage gardening“.

Camouflage gardening is the practice of using plants that animals don’t like to deter them from eating plants that they do like. Camouflage gardening is mostly focused on deterring deer, but can work for rabbits, squirrels, and even dogs and cats with appropriate plantings. I must point out and stress that this deters animals like deer from eating desirable plants, it doesn’t prevent them from eating anything.

Deer exploring my new vegetable garden

Think of it as constructing a castle or defensive military position. The plant you want to protect is in the center of the defensive zone. It’s surrounded by a barrier of deer-resistant plants. For superior defense you layer zones with additional rings of protection. You’re not building walls to protect plants but using plants to protect plants.

There are certain plants that deer, and similarly many other animals, don’t like. Deer tend to avoid plants that are strongly aromatic or bitter tasting, that have a milky or sticky sap, or that have prickly leaves or are tough and hairy. When they encounter these plants they tend to ignore them and move on.

Deer are browsers that amble from plant to plant looking for something they like. If a plant isn’t on their list of favorites, they’ll keep looking for one that is. This assumes that they have an adequate food selection available. When conditions are bad, as in drought years or when habitat is reduced, they’ll eat almost anything to stay alive. In spring pregnant does will eat almost anything.


Deer look everywhere for food
To get the best protection and to help minimize problems during bad years, the outside protective zone, which is the first that deer encounter, would have a plant that is highly resistant to deer. This layer should have plants that are aromatic with an odor that makes them walk away. You create a scent barrier that prevents them from smelling desirable plants. Lavender, mint, salvia, beebalm, rosemary, and cedar are some plants that have a smell deer avoid and are also rarely eaten.


Salvia and yarrow are deterrents

The second layer of protection would include bad-tasting or toxic plants. The idea is that if they wander past or through the first protective zone they’ll come across plants that they don’t want to eat. Holly, juniper, feathergrass, zinnia, and barberry are rarely eaten. Plants like elderberry, poppies, bleeding heart, lobelia, and larkspur can be toxic. When deer encounter these plants they should go in the opposite direction.

A third layer of protection is to offer a suicide zone. This is a grouping of fast-growing plants outside the protected area that are less deer resistant. Honeysuckle, trumpet creeper, morning glory, and clematis are plants that deer will nibble without decimating the plant. Flowers that reseed prolifically fit in here too. Planted strategically, these plants can lead deer away from more desirable beds.

With a simple two-stage protection planting plan, deer will come across your landscape, realize they don’t like the smells and tastes, and keep on walking. If they’re curious or extra hungry, they’ll try nibbling on what they find but if they don’t like it they’ll realize this whole yard isn’t worth their time and effort and will move on to your neighbor’s yard. They never make it to the roses or tulips or young fruit tree that they would devour.

Adding a suicide zone gives them someplace else to go as they walk away from your garden. They may eat a few clematis or morning glory flowers as they avoid the aromas and tastes of the other zones. Asters, petunias, and small sunflowers give them something else to nibble, and will grow back soon.


My sunflowers were sacrificial plants

As you plan a camouflage garden you don’t need to think in terms of clearly defined rings of plants. The first and second protective zones can be intermingled, with aromatic plants planted among bitter and toxic ones. The concept is that one plant deters the deer and when they move to a second plant it deters them too. Ideally every plant they encounter within a defined space is a deterrent and they never move through it.

When you have a mix of plants with many deer deterrent properties it creates a synergy where the entire garden becomes highly effective at deterring deer. A wide spectrum of aromatic plants can confuse deer to the point that they seek a more simple, clearly identifiable source of food… like the big expanse of tulips down the street.

To be most effective camouflage gardening needs to be as year-round as possible. If the plant you’re hoping to protect blooms or buds before the others, deer can find it. Your deterrent plants need to be in position and producing their deterring effect.

For example, for early spring your garden border is planted with dwarf juniper, rosemary, sage, or artemisia — plants that are still fragrant even when they’re dormant. A fragrant groundcover like thyme covers the area. A large planting of daffodils, plants deer typically don’t eat, brings early color and helps create another deer deterrent barrier. Irises come next, another plant deer typically don’t eat. At the center of your display for height and color are your tulips, a plant that deer love to devour.

Depending on variety, you may have irises and tulips flowering together which adds extra confusion to the deer. It’s not a perfect solution. In a good year your tulips are spared; in a very bad year everything is eaten.

I’m planting my new landscape with entire beds of deterrent plants. One bed has lavender on one side and various spirea on the other. Miscanthus grass provides height and interest. Purple coneflower and yarrow add color. Apache plume fills the center for added texture color and interest. It’s highly satisfying to see deer tracks in and around the bed and not a single plant is disturbed.
Another bed has creeping phlox, artemisia, dwarf pines, salvia, yucca, columbines, irises, and daffodils; again, there are tracks but no damage. Next year’s new beds will have similar plantings.


A young deer walks away from new beds

We have a resident deer population. They even bed down among the gambel oak trees in our backyard. I’m hoping that they’ll get used to encountering so many plants they don’t like that by the time I plant young trees and a few other less-resistant perennials they’ll have learned to go some place else for breakfast, lunch, and dinner. Already I’ve noticed more tracks walking around my deer-resistant beds than walking through them.


Some neighbors never go away

For your camouflage garden, research deer deterrent plants. You won’t need to sacrifice color, smell, texture, or height. Select plants that you like to grow normally. Then design your beds and landscape with those plants as the first barrier. Continue with plantings of other deer-resistant plants that you want in your landscape. Personalize the space. You don’t need to grow plants you don’t like.

Camouflage gardening isn’t foolproof. The only sure way to protect plants is with a physical barrier. For prized plants and young trees a fence or metal wall is the only sure deer proofing. Used together, camouflage and wire fences can allow plants that deer like to eat to become large enough and established to the point they don’t need a fence.

Camouflage gardening works best in a large landscape or garden with enough space to allow planting the necessary barrier plants, but even in small gardens the same principles can be beneficial. Make plants that deer and other animals avoid your first line of defense. Hide your other plants with smells and tastes that deter deer. With a little planning and a lot of luck you may be able to enjoy plants that you’ve had problems with before.

Check out my video on how to deer proof your garden on my video channel:

https://www.youtube.com/gardenerscott

Friday, August 23, 2013

Understanding AHS Plant Heat Zones

What are AHS Plant Heat Zones? They're the counterpart to USDA Plant Hardiness Zones. USDA Plant Hardiness Zones are based on average cold temperatures of winter and the AHS Plant Heat Zones are based on average hot temperatures of summer. Hardiness Zones help gardeners determine if a plant can survive their region's winter extreme temperatures while Heat Zones help determine if a plant can survive their summer extreme temperatures.

The American Horticultural Society coordinated with the same people who helped develop the USDA Hardiness Zone map to develop a Heat Zone map based on temperature data from the National Climactic Data Center. Daily high temperatures from National Weather Service stations throughout the United States were compiled for the years 1974 through  1995. In 1997 they produced a national map representing their findings.

The result is a map that color codes the country into 12 zones that indicate the average number of days when the temperature is above 86F degrees (30C). These are "heat days". Zone 1 has an average of less than one day per year above 86 degrees while Zone 12 has an average of more than 210 days above 86 degrees.

Why 86F (30C) degrees? That is the point that many plants begin to experience distress and potential damage from sustained heat. Above this point plants can drop blossoms, drop leaves, fade in color, reduce fruit development, and possibly die. Some plants won't die right away but will be stressed for so long that each year they perform less productively than the year before.

Many plants will wilt in heat, but will recover once temperatures fall. Sustained heat can have a serious physiological impact on some plants and triggers a lingering decline to ultimate death. Knowing how a plant will handle hot days is the reason for the AHS Heat Zone Map.

Most gardeners are familiar with the USDA Hardiness Zone system and look for the number on a plant tag when selecting new plantings. I live in Zone 5 and always make sure new perennial plants are at least hardy down to -20F degrees that the zone represents. I prefer plants hardy to Zone 4 for the occasional extremely low temperatures we get that approach -30F in winter.

I'm in AHS Plant Heat Zone 5. That represents 30 to 45 days above 86F degrees. I prefer to select plants for at least Zone 6 for the recent hot summers we've had; Zone 6 allows for 45 to 60 days above 86F. This year we're definitely encroaching on Zone 6 heat days.

Plant growers and distributors that include AHS Plant Heat Zones on tags will list both zone ranges. You'll now find a listing like "3-9, 6-1". That means the plant is suitable for USDA Hardiness Zones 3 through 9 and is suitable for AHS Heat Zones 6 through 1. Many plant catalogs are also including this information in their plant descriptions.

For me, an ideal plant would be something like "4-9, 7-1". That means it can handle the cold of the Hardiness Zone 4 and the heat of Heat Zone 7. My garden is well within both ranges and the plant should do well.

There are some limitations with the AHS Heat Zone map. Because it is relatively new and unknown, there aren't many resources available to make it easy for you to identify your zone. You have to try and determine exactly where your city falls within the zones on the national map. Apparently the AHS had a tool for determining exact locations, but the zone finder application is nowhere to be found now. I haven't been able to find any other source for finding Heat Zones by zip code like the USDA map has.

You can look at the map at: http://www.ahs.org/gardening-resources/gardening-maps/heat-zone-map

At gardening resources.com I found a breakdown of the Heat Zones by state, which was a little easier to read. You can find it here: http://www.gardeningplaces.com/heatzonemap/

Over 15,000 plants have been coded for heat tolerance. As more plants are coded and more companies begin listing both USDA and AHS zones on plant information, you can expect more gardeners to become familiar and comfortable with the conversion to a two-zone system.

For many of us we choose our plants, put them in our gardens, and then see how they do. For various reasons some plants do well while others struggle. Using both zone maps for selecting plants can help us put in plants that will not only grow well, but will thrive.

If some of your plants didn't do well in summer it may be because they weren't able to tolerate your garden's hot days. That may be an indication that they're inappropriate for your region. Understanding and using the AHS Heat Zones can help prevent similar problems in the future.

Link to the AHS Heat Zone map: http://www.ahs.org/gardening-resources/gardening-maps/heat-zone-map

Link to gardeningplaces.com state maps: http://www.gardeningplaces.com/heatzonemap/

What are AHS Plant Heat Zones? They're the counterpart to USDA Plant Hardiness Zones. USDA Plant Hardiness Zones are based on average cold temperatures of winter and the AHS Plant Heat Zones are based on average hot temperatures of summer. Hardiness Zones help gardeners determine if a plant can survive their region's winter extreme temperatures while Heat Zones help determine if a plant can survive their summer extreme temperatures.

The American Horticultural Society coordinated with the same people who helped develop the USDA Hardiness Zone map to develop a Heat Zone map based on temperature data from the National Climactic Data Center. Daily high temperatures from National Weather Service stations throughout the United States were compiled for the years 1974 through  1995. In 1997 they produced a national map representing their findings.

The result is a map that color codes the country into 12 zones that indicate the average number of days when the temperature is above 86F degrees (30C). These are "heat days". Zone 1 has an average of less than one day per year above 86 degrees while Zone 12 has an average of more than 210 days above 86 degrees.

Why 86F (30C) degrees? That is the point that many plants begin to experience distress and potential damage from sustained heat. Above this point plants can drop blossoms, drop leaves, fade in color, reduce fruit development, and possibly die. Some plants won't die right away but will be stressed for so long that each year they perform less productively than the year before.

Many plants will wilt in heat, but will recover once temperatures fall. Sustained heat can have a serious physiological impact on some plants and triggers a lingering decline to ultimate death. Knowing how a plant will handle hot days is the reason for the AHS Heat Zone Map.

Most gardeners are familiar with the USDA Hardiness Zone system and look for the number on a plant tag when selecting new plantings. I live in Zone 5 and always make sure new perennial plants are at least hardy down to -20F degrees that the zone represents. I prefer plants hardy to Zone 4 for the occasional extremely low temperatures we get that approach -30F in winter.

I'm in AHS Plant Heat Zone 5. That represents 30 to 45 days above 86F degrees. I prefer to select plants for at least Zone 6 for the recent hot summers we've had; Zone 6 allows for 45 to 60 days above 86F. This year we're definitely encroaching on Zone 6 heat days.

Plant growers and distributors that include AHS Plant Heat Zones on tags will list both zone ranges. You'll now find a listing like "3-9, 6-1". That means the plant is suitable for USDA Hardiness Zones 3 through 9 and is suitable for AHS Heat Zones 6 through 1. Many plant catalogs are also including this information in their plant descriptions.

For me, an ideal plant would be something like "4-9, 7-1". That means it can handle the cold of the Hardiness Zone 4 and the heat of Heat Zone 7. My garden is well within both ranges and the plant should do well.

There are some limitations with the AHS Heat Zone map. Because it is relatively new and unknown, there aren't many resources available to make it easy for you to identify your zone. You have to try and determine exactly where your city falls within the zones on the national map. Apparently the AHS had a tool for determining exact locations, but the zone finder application is nowhere to be found now. I haven't been able to find any other source for finding Heat Zones by zip code like the USDA map has.

You can look at the map at: http://www.ahs.org/gardening-resources/gardening-maps/heat-zone-map

At gardening resources.com I found a breakdown of the Heat Zones by state, which was a little easier to read. You can find it here: http://www.gardeningplaces.com/heatzonemap/

Over 15,000 plants have been coded for heat tolerance. As more plants are coded and more companies begin listing both USDA and AHS zones on plant information, you can expect more gardeners to become familiar and comfortable with the conversion to a two-zone system.

For many of us we choose our plants, put them in our gardens, and then see how they do. For various reasons some plants do well while others struggle. Using both zone maps for selecting plants can help us put in plants that will not only grow well, but will thrive.

If some of your plants didn't do well in summer it may be because they weren't able to tolerate your garden's hot days. That may be an indication that they're inappropriate for your region. Understanding and using the AHS Heat Zones can help prevent similar problems in the future.

Link to the AHS Heat Zone map:
http://www.ahs.org/gardening-resources/gardening-maps/heat-zone-map

Link to gardeningplaces.com state maps: http://www.gardeningplaces.com/heatzonemap/

Wednesday, April 17, 2013

Planning a Deer Resistant Garden

There is just one way to have a deer proof garden -- plant everything within the borders of a strong fence eight feet tall. For the rest of us, the best we can hope for is a deer resistant garden. Like all animals, deer have foods they prefer, foods they tolerate, and foods they avoid. The key for gardeners desiring a beautiful garden that deer walk past is to select plants in the latter category.

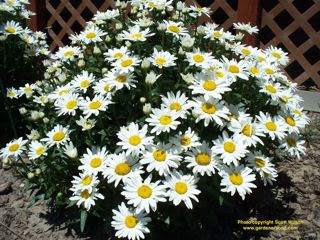
Shasta Daisies look great and are deer resistant

Let me qualify what "deer resistant" means. A deer resistant plant is one that deer do not eat as a primary food source. They may chew a few buds and occasionally pull off a leaf or two, but the plant is allowed to reach maturity with little molestation. Deer are browsers and will nibble on what they find; deer resistant plants are the ones they test and then walk away from.

It's important to acknowledge that deer, like all animals, will eat anything if they're hungry enough. Deer resistant plants are not a normal part of their diet, but under drought and low vegetation conditions deer will devour plants they have ignored for years. A doe with a new fawn won't venture far from it, so she will feed on less-than-desired plants nearby. Also, there are plants that hungry deer will only eat in winter and leave alone the rest of the year.

Purple Coneflowers are usually left alone

It's also important to acknowledge that deer will go out of their way to indulge in a garden offering plants they consider delicious. A garden loaded with roses, azaleas, geraniums, hosta, tulips, and fruit trees screams to the deer that the smorgasbord is open. The problem is that many gardeners also desire those same plants in their garden. Trying to maintain this kind of garden in the presence of a local herd can be nerve-wracking.

A deer resistant garden can be abundant and beautiful, but it requires careful plant selection. As I begin planning the landscape for my new house my focus is on gardens that will give me everything I want while denying the numerous deer a tasty lunch.

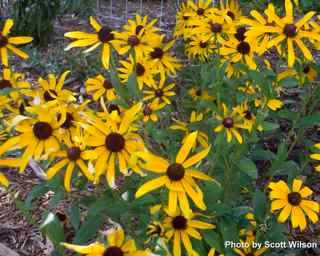
Deer tend to avoid Black-eyed Susan

As with all garden planning, there are important steps to take to get it right. An analysis of sun, shade, water, soil, USDA Hardiness Zone, and available space is critical to a good garden plan. Plants will do best when they're matched with the proper soil and location for their growth habits. Once this analysis is done, plants can be selected.

Generally, deer don't like plants with a strong aroma or with thorns or spines. They tend to stay away from decorative grasses. Many native plants are resistant to deer in areas where deer are native.

An assumption in growing deer resistant plants is that there are other food sources available to local herds. When deer have access to water and plants they like, they'll leave less desirable plants alone. When their only food sources are deer resistant plants, then that's what they'll eat. That's why there are so many conflicting discussions by gardeners as to whether a plant is deer resistant. For every gardener who has never had deer eat his plants there is another gardener who has deer eat every one of hers.

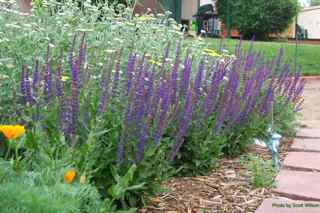
Salvia is universally acknowledged as deer resistant

Let's begin with deer resistant plants for full sun locations. Lucky for me, many of the plants I like to grow are naturally deer resistant; I have a minor deer problem at my current house and have never had a problem with these plants:

  • Agastache
  • Allium
  • Artemisia 
  • Barberry
  • Columbine
  • Coneflower
  • Coreopsis
  • Daffodil
  • Dianthus
  • Foxglove 
  • Gaillardia
  • Hens and Chicks
  • Lantana
  • Lavender
  • Penstemon
  • Potentilla
  • Rose Campion
  • Rudbeckia
  • Russian Sage
  • Salvia
  • Shasta Daisy
  • Snapdragon
  • Spirea 'Magic Carpet'
  • Yarrow
  • Yucca

There is no lack of color, texture, and variety in this list. All of them are very resistant to deer in most landscapes. Many of them require little irrigation, which is a plus in my arid region.

Here are some plants for shade or partial shade areas.

  • Allium
  • Ajuga
  • Astilbe
  • Bleeding Hearts
  • Coral Bells
  • Fuchsia
  • Monkshood
  • Peony

I don't currently grow these plants but will in my new landscape. I also plan to add:

  • Apache Plume
  • Buddleia
  • Fountain Grass
  • Miscanthus
  • Pampus Grass

The key to identifying deer resistant plants for your landscape is to conduct a little research. Many county Extension offices have fact sheets for local deer resistant plants. The internet allows cross referencing this government information. I easily found that New Jersey, Minnesota, and Colorado Extension information matches my own experience with the plants listed above.

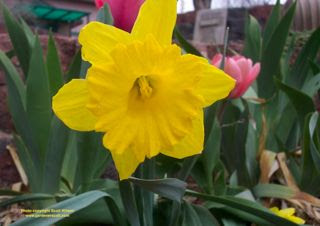
Daffodils are on everyone's list of deer resistant plants

One of the best sources for local information about deer resistant plants is to ask a fellow gardener. Find out what your friends have trouble with and what they have success with when deer are involved.

I have a gardening friend who likes to grow Arborvitae and has to fence in each plant to prevent damage; Arborvitae is on the list of plants deer like to munch. I've tried to grow cherry, apple and plum trees in my current landscape and the deer have devastated them; they'll even push through the protective netting to nibble the buds. Those of us who have built structures to try and keep deer out will gladly share our experience.

Asking for advice can save valuable time, energy, and money. Geraniums cover the gamut of deer preference. Some varieties of geranium are like candy to deer while others are like vinegar. Find out what your friends are growing and copy their successes. I haven't seen Asian Lilies on any deer resistant plant list, but in my neighborhood they leave all of mine alone.

My lilies are left alone by deer

It's possible to get away with tricking deer. A few plants that they might eat may survive if they're planted among groupings of plants that they avoid. They'll tend to leave the whole group alone when they see an abundance of deer resistant plants.

I also believe in creative sacrifice. If you want to grow plants that deer may like to eat, also grow plants that they definitely like to eat. Grow plants like wild strawberries, raspberries, Virginia creeper, and sunflowers as a friendly offering. When they venture into your yard they'll gravitate toward those tasty morsels and are more likely to leave your treasured plants alone.

My offering to save my vegetable garden

With proper planning and plant selection, maintaining a successful and beautiful landscape in the presence of deer is not only possible, but easy. Choose deer resistant plants and let your gardens prosper.


There is just one way to have a deer proof garden -- plant everything within the borders of a strong fence eight feet tall. For the rest of us, the best we can hope for is a deer resistant garden. Like all animals, deer have foods they prefer, foods they tolerate, and foods they avoid. The key for gardeners desiring a beautiful garden that deer walk past is to select plants in the latter category.

Shasta Daisies look great and are deer resistant

Let me qualify what "deer resistant" means. A deer resistant plant is one that deer do not eat as a primary food source. They may chew a few buds and occasionally pull off a leaf or two, but the plant is allowed to reach maturity with little molestation. Deer are browsers and will nibble on what they find; deer resistant plants are the ones they test and then walk away from.

It's important to acknowledge that deer, like all animals, will eat anything if they're hungry enough. Deer resistant plants are not a normal part of their diet, but under drought and low vegetation conditions deer will devour plants they have ignored for years. A doe with a new fawn won't venture far from it, so she will feed on less-than-desired plants nearby. Also, there are plants that hungry deer will only eat in winter and leave alone the rest of the year.

Purple Coneflowers are usually left alone

It's also important to acknowledge that deer will go out of their way to indulge in a garden offering plants they consider delicious. A garden loaded with roses, azaleas, geraniums, hosta, tulips, and fruit trees screams to the deer that the smorgasbord is open. The problem is that many gardeners also desire those same plants in their garden. Trying to maintain this kind of garden in the presence of a local herd can be nerve-wracking.

A deer resistant garden can be abundant and beautiful, but it requires careful plant selection. As I begin planning the landscape for my new house my focus is on gardens that will give me everything I want while denying the numerous deer a tasty lunch.

Deer tend to avoid Black-eyed Susan

As with all garden planning, there are important steps to take to get it right. An analysis of sun, shade, water, soil, USDA Hardiness Zone, and available space is critical to a good garden plan. Plants will do best when they're matched with the proper soil and location for their growth habits. Once this analysis is done, plants can be selected.

Generally, deer don't like plants with a strong aroma or with thorns or spines. They tend to stay away from decorative grasses. Many native plants are resistant to deer in areas where deer are native.

An assumption in growing deer resistant plants is that there are other food sources available to local herds. When deer have access to water and plants they like, they'll leave less desirable plants alone. When their only food sources are deer resistant plants, then that's what they'll eat. That's why there are so many conflicting discussions by gardeners as to whether a plant is deer resistant. For every gardener who has never had deer eat his plants there is another gardener who has deer eat every one of hers.

Salvia is universally acknowledged as deer resistant

Let's begin with deer resistant plants for full sun locations. Lucky for me, many of the plants I like to grow are naturally deer resistant; I have a minor deer problem at my current house and have never had a problem with these plants:

  • Agastache
  • Allium
  • Artemisia 
  • Barberry
  • Columbine
  • Coneflower
  • Coreopsis
  • Daffodil
  • Dianthus
  • Foxglove 
  • Gaillardia
  • Hens and Chicks
  • Lantana
  • Lavender
  • Penstemon
  • Potentilla
  • Rose Campion
  • Rudbeckia
  • Russian Sage
  • Salvia
  • Shasta Daisy
  • Snapdragon
  • Spirea 'Magic Carpet'
  • Yarrow
  • Yucca

There is no lack of color, texture, and variety in this list. All of them are very resistant to deer in most landscapes. Many of them require little irrigation, which is a plus in my arid region.

Here are some plants for shade or partial shade areas.

  • Allium
  • Ajuga
  • Astilbe
  • Bleeding Hearts
  • Coral Bells
  • Fuchsia
  • Monkshood
  • Peony

I don't currently grow these plants but will in my new landscape. I also plan to add:

  • Apache Plume
  • Buddleia
  • Fountain Grass
  • Miscanthus
  • Pampus Grass

The key to identifying deer resistant plants for your landscape is to conduct a little research. Many county Extension offices have fact sheets for local deer resistant plants. The internet allows cross referencing this government information. I easily found that New Jersey, Minnesota, and Colorado Extension information matches my own experience with the plants listed above.

Daffodils are on everyone's list of deer resistant plants

One of the best sources for local information about deer resistant plants is to ask a fellow gardener. Find out what your friends have trouble with and what they have success with when deer are involved.

I have a gardening friend who likes to grow Arborvitae and has to fence in each plant to prevent damage; Arborvitae is on the list of plants deer like to munch. I've tried to grow cherry, apple and plum trees in my current landscape and the deer have devastated them; they'll even push through the protective netting to nibble the buds. Those of us who have built structures to try and keep deer out will gladly share our experience.

Asking for advice can save valuable time, energy, and money. Geraniums cover the gamut of deer preference. Some varieties of geranium are like candy to deer while others are like vinegar. Find out what your friends are growing and copy their successes. I haven't seen Asian Lilies on any deer resistant plant list, but in my neighborhood they leave all of mine alone.

My lilies are left alone by deer

It's possible to get away with tricking deer. A few plants that they might eat may survive if they're planted among groupings of plants that they avoid. They'll tend to leave the whole group alone when they see an abundance of deer resistant plants.

I also believe in creative sacrifice. If you want to grow plants that deer may like to eat, also grow plants that they definitely like to eat. Grow plants like wild strawberries, raspberries, Virginia creeper, and sunflowers as a friendly offering. When they venture into your yard they'll gravitate toward those tasty morsels and are more likely to leave your treasured plants alone.

My offering to save my vegetable garden

With proper planning and plant selection, maintaining a successful and beautiful landscape in the presence of deer is not only possible, but easy. Choose deer resistant plants and let your gardens prosper.


Friday, March 1, 2013

Home Garden Crop Rotation

Growing the same crop in the same location year after year can deplete essential soil nutrients in that area, subject plants to harmful diseases, and adversely affect the crop's growth, health, and production. To avoid this, for thousands of years farmers have practiced two, soil-enhancing, growing methods. The first is allowing a field to lie fallow. Periodically after harvest, plants are turned into the soil and allowed to decompose for a year; essentially it is in-place composting.

The second method is crop rotation. Different crops are planted in different years in a single field. For home gardeners, allowing a garden to remain unplanted goes against the very essence of why we garden so practicing crop rotation to prevent a cycle of diminishing harvest is the best idea.

Crop rotation is used to keep soil from losing nutrients that a specific plant needs. A plant like corn needs a lot of nitrogen from the soil. When it is planted in the same spot repeatedly, it will ultimately deplete all available soil nitrogen, committing a slow suicide. On a commercial level, farmers add tons of nitrogen fertilizer to soil to artificially feed the plants. On a local level, home gardeners add nitrogen fertilizer to their soils when they notice reduced plant growth too.

Effective home garden crop rotation can drastically reduce the need for supplemental fertilization and helps maintain a healthy, balanced, nutrient-rich soil. For organic gardeners it is almost a must.

My garden is different each year with crop rotation

The concept of crop rotation is simple. Crop A is planted in year one, Crop B is planted in the same location in year two instead of Crop A, Crop C is planted in year three instead of Crop A or B, and so on until the cycle is repeated.

The simplest cycle is a two-crop rotation where a plant like corn is planted one year and a crop like peas is planted in the same bed the next year. Then the cycle repeats each year with corn followed by peas followed by corn followed by peas; each cycle is completed in two years. A three-crop rotation takes three years to complete. A seven-crop rotation takes seven years.

The selection of the plants for each year is the most important aspect of crop rotation. To be effective, each successive planting should grow differently than the previous planting. In the two-crop example above, corn grows in a spot, depleting soil nitrogen. The next year a legume like peas is planted to replenish soil nitrogen. Many legumes have root nodules that harbor beneficial bacteria that takes nitrogen from the air and fixes it into the soil.

Peas and similar legumes add nitrogen to soil

In a home garden, legumes are a great choice in an easy crop rotation cycle. Peas, beans, lentils, and soybeans provide a nice harvest while adding nitrogen to soil. Other plants like clover, alfalfa, and vetch don't offer a harvest, but have the same beneficial properties. I use vetch in my garden as part of my crop rotations; the vetch is attractive with pretty little purple flowers. After a season of growth that fixes nitrogen into the soil, the plants are tilled in to add additional organic material.

Vetch in my garden

I like to practice a three-year crop rotation in my garden. In recent years I've done a tomato-pea-cucumber cycle, a garlic-pea-spinach cycle, and a beet-bean-cucumber cycle. In each of those cycles I also grew vetch. Vetch can handle cold weather so I sow it in fall after I've harvested and cleaned up a bed. The vetch grows into winter and again in early spring; I turn it into the soil about six weeks before planting the new season's crops. For plants with early summer harvest, I'll sow vetch and allow it to grow during the remaining summer and early fall.

A basic three-crop cycle of sowing plants that produce nitrogen, followed by plants that are heavy nitrogen feeders, followed by plants that are light feeders is easy to start.

A four-crop cycle is also easy if you divide plants into groups. Fruiting plants like tomatoes, cucumbers, and pumpkins is one group. Leafy plants like spinach, kale, and broccoli is a second. Root vegetables like carrots, beets, and potatoes is a third. Legumes like fava beans, peas, and lentils is a fourth.

Squash will make way for another crop

Another important reason to rotate your crops is to reduce disease and pest problems. Tomato plants are very susceptible to soil-borne pests and pathogens. In the first year of planting a new bed, tomatoes often do very well, but after being in the same spot for a period of years they suddenly seem to have problems with early blight, fusarium wilt, or leaf spot. The fungus or bacteria that causes many potential tomato problems lives in soil.

Once a plant is infected it spreads that pathogen into more soil. Any new plants in the bed will become infected and help spread it further. Crop rotation breaks this cycle. An infected plant may adversely affect soil, but if there is no new plant to spread the fungus, bacteria, or virus, it will eventually diminish and no longer cause problems.

This works because the pathogens are plant specific; tomato disease will not affect corn, peas, spinach, or pumpkins. Crop rotation helps keep plant problems from becoming established in your garden. Before tomato pathogens develop, another plant like beans grow in the bed, then a plant like spinach is planted before bean problems develop.

Knowing what plants you want to grow and the most likely diseases in your region will help you determine the best cycle. Many fungi that affect tomatoes remain viable in soil past three years so a four-crop rotation is recommended. By the time tomatoes are planted again, the threat is gone.

It's important to be aware of plant families when planning and planting. Tomato, eggplants, and potatoes can be susceptible to the same pathogens. Tomatoes and peppers have similar problems. For that reason similar plant families should not be included in a crop cycle; avoid planting tomatoes and peppers or tomatoes and potatoes in the same bed within a single crop cycle.

I practice a three-crop cycle because it's easy to plan and easy to do. It reduces the potential for problems, but isn't foolproof. If I do encounter problems in a bed, like tomatoes, I'll make note and transform that bed's cycle into a four-crop or five-crop model.

Occasionally I get lazy or behind in planting and repeat crops in a bed. Problems don't automatically develop, but I do try to get back on track for the next year.

For virtually flawless results, a seven-crop cycle can be followed. There are very few pathogens or pests that will survive seven years in soil. Extra effort should be taken to insure adequate legumes are added in the sequence. If you have the space and the inclination to develop this more-complicated cycle plan, seven is the magic number.

Home garden crop rotation also provides a great opportunity to amend your garden soil. Because you're cleaning up each bed before planting a new crop, the addition of compost is easy to do as part of soil preparation before sowing or planting. Tilling in the spent plants from the previous season, like I do with vetch, also adds important organic material to soil.

Only perennials like rhubarb stay in the same spot

The combination of crop rotation and soil amending acts to maintain a healthy soil environment. Beneficial soil bacteria and organisms thrive while harmful ones diminish and the microorganisms help make soil nutrients available to plants, enhancing overall garden production.

It does take a minimal amount of extra time to plan and initiate a new crop cycle. Depending on the size of your garden you may have to forgo certain crops in some years if there isn't enough space for a complete cycle for all garden plants. I accept these limitations as a tradeoff for a better garden overall. Occasionally doing without chard or parsnips or butternut squash is okay.

Home garden crop rotation is easy to do and has many benefits. While you're planning your next garden, think about doing it a little different than last time.


Growing the same crop in the same location year after year can deplete essential soil nutrients in that area, subject plants to harmful diseases, and adversely affect the crop's growth, health, and production. To avoid this, for thousands of years farmers have practiced two, soil-enhancing, growing methods. The first is allowing a field to lie fallow. Periodically after harvest, plants are turned into the soil and allowed to decompose for a year; essentially it is in-place composting.

The second method is crop rotation. Different crops are planted in different years in a single field. For home gardeners, allowing a garden to remain unplanted goes against the very essence of why we garden so practicing crop rotation to prevent a cycle of diminishing harvest is the best idea.

Crop rotation is used to keep soil from losing nutrients that a specific plant needs. A plant like corn needs a lot of nitrogen from the soil. When it is planted in the same spot repeatedly, it will ultimately deplete all available soil nitrogen, committing a slow suicide. On a commercial level, farmers add tons of nitrogen fertilizer to soil to artificially feed the plants. On a local level, home gardeners add nitrogen fertilizer to their soils when they notice reduced plant growth too.

Effective home garden crop rotation can drastically reduce the need for supplemental fertilization and helps maintain a healthy, balanced, nutrient-rich soil. For organic gardeners it is almost a must.

My garden is different each year with crop rotation

The concept of crop rotation is simple. Crop A is planted in year one, Crop B is planted in the same location in year two instead of Crop A, Crop C is planted in year three instead of Crop A or B, and so on until the cycle is repeated.

The simplest cycle is a two-crop rotation where a plant like corn is planted one year and a crop like peas is planted in the same bed the next year. Then the cycle repeats each year with corn followed by peas followed by corn followed by peas; each cycle is completed in two years. A three-crop rotation takes three years to complete. A seven-crop rotation takes seven years.

The selection of the plants for each year is the most important aspect of crop rotation. To be effective, each successive planting should grow differently than the previous planting. In the two-crop example above, corn grows in a spot, depleting soil nitrogen. The next year a legume like peas is planted to replenish soil nitrogen. Many legumes have root nodules that harbor beneficial bacteria that takes nitrogen from the air and fixes it into the soil.

Peas and similar legumes add nitrogen to soil

In a home garden, legumes are a great choice in an easy crop rotation cycle. Peas, beans, lentils, and soybeans provide a nice harvest while adding nitrogen to soil. Other plants like clover, alfalfa, and vetch don't offer a harvest, but have the same beneficial properties. I use vetch in my garden as part of my crop rotations; the vetch is attractive with pretty little purple flowers. After a season of growth that fixes nitrogen into the soil, the plants are tilled in to add additional organic material.

Vetch in my garden

I like to practice a three-year crop rotation in my garden. In recent years I've done a tomato-pea-cucumber cycle, a garlic-pea-spinach cycle, and a beet-bean-cucumber cycle. In each of those cycles I also grew vetch. Vetch can handle cold weather so I sow it in fall after I've harvested and cleaned up a bed. The vetch grows into winter and again in early spring; I turn it into the soil about six weeks before planting the new season's crops. For plants with early summer harvest, I'll sow vetch and allow it to grow during the remaining summer and early fall.

A basic three-crop cycle of sowing plants that produce nitrogen, followed by plants that are heavy nitrogen feeders, followed by plants that are light feeders is easy to start.

A four-crop cycle is also easy if you divide plants into groups. Fruiting plants like tomatoes, cucumbers, and pumpkins is one group. Leafy plants like spinach, kale, and broccoli is a second. Root vegetables like carrots, beets, and potatoes is a third. Legumes like fava beans, peas, and lentils is a fourth.

Squash will make way for another crop

Another important reason to rotate your crops is to reduce disease and pest problems. Tomato plants are very susceptible to soil-borne pests and pathogens. In the first year of planting a new bed, tomatoes often do very well, but after being in the same spot for a period of years they suddenly seem to have problems with early blight, fusarium wilt, or leaf spot. The fungus or bacteria that causes many potential tomato problems lives in soil.

Once a plant is infected it spreads that pathogen into more soil. Any new plants in the bed will become infected and help spread it further. Crop rotation breaks this cycle. An infected plant may adversely affect soil, but if there is no new plant to spread the fungus, bacteria, or virus, it will eventually diminish and no longer cause problems.

This works because the pathogens are plant specific; tomato disease will not affect corn, peas, spinach, or pumpkins. Crop rotation helps keep plant problems from becoming established in your garden. Before tomato pathogens develop, another plant like beans grow in the bed, then a plant like spinach is planted before bean problems develop.

Knowing what plants you want to grow and the most likely diseases in your region will help you determine the best cycle. Many fungi that affect tomatoes remain viable in soil past three years so a four-crop rotation is recommended. By the time tomatoes are planted again, the threat is gone.

It's important to be aware of plant families when planning and planting. Tomato, eggplants, and potatoes can be susceptible to the same pathogens. Tomatoes and peppers have similar problems. For that reason similar plant families should not be included in a crop cycle; avoid planting tomatoes and peppers or tomatoes and potatoes in the same bed within a single crop cycle.

I practice a three-crop cycle because it's easy to plan and easy to do. It reduces the potential for problems, but isn't foolproof. If I do encounter problems in a bed, like tomatoes, I'll make note and transform that bed's cycle into a four-crop or five-crop model.

Occasionally I get lazy or behind in planting and repeat crops in a bed. Problems don't automatically develop, but I do try to get back on track for the next year.

For virtually flawless results, a seven-crop cycle can be followed. There are very few pathogens or pests that will survive seven years in soil. Extra effort should be taken to insure adequate legumes are added in the sequence. If you have the space and the inclination to develop this more-complicated cycle plan, seven is the magic number.

Home garden crop rotation also provides a great opportunity to amend your garden soil. Because you're cleaning up each bed before planting a new crop, the addition of compost is easy to do as part of soil preparation before sowing or planting. Tilling in the spent plants from the previous season, like I do with vetch, also adds important organic material to soil.

Only perennials like rhubarb stay in the same spot

The combination of crop rotation and soil amending acts to maintain a healthy soil environment. Beneficial soil bacteria and organisms thrive while harmful ones diminish and the microorganisms help make soil nutrients available to plants, enhancing overall garden production.

It does take a minimal amount of extra time to plan and initiate a new crop cycle. Depending on the size of your garden you may have to forgo certain crops in some years if there isn't enough space for a complete cycle for all garden plants. I accept these limitations as a tradeoff for a better garden overall. Occasionally doing without chard or parsnips or butternut squash is okay.

Home garden crop rotation is easy to do and has many benefits. While you're planning your next garden, think about doing it a little different than last time.


Wednesday, February 13, 2013

Starting a New Garden

Dreaming of, planning, and building a garden are my favorite aspects of gardening. I like selecting plants, tending to them, and enjoying the fruits of my labors, but it's the actual garden development and construction that gives me the most satisfaction. Standing quietly, looking at a bare spot for hours or days, and envisioning the potential that lies in the soil offers me a true connection with the process of creation, growth, and fulfillment.

Many flower, grass, and xeriscape beds have adorned my landscape over the years and planning the steps through completion have evolved with each of them. Staking out a space and bringing it to bloom is fascinating, but it is in the development of vegetable gardens that my true gardening spirit soars.

I've enjoyed the effort and success of two major vegetable gardens. One began as a rock-covered slope that evolved into a productive, terraced, lush and verdant space. Over the course of eight years it progressed from barren, sandy soil to an amalgam of beneficial amendments producing healthy plants in a challenging environment.

The gardening site in the beginning

The finished garden

The second garden began as a sun-baked patch of prairie sod and evolved into a deer-resistant, biochar-infused, raised-bed nirvana at 7,500 feet elevation. Three years of labor have just begun to lay the foundation for future growth.

The starting point

A transformed space

Now I have the opportunity to birth a third vegetable garden. Last week we closed the contract on a house back in the city of Colorado Springs and will begin the move in a few months. The new garden spot will be a full 1,000 feet lower in elevation and grant me two to four extra weeks in the growing season. It too has deer and a new challenge, rabbits.

A bunny in the front yard

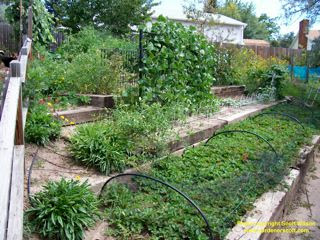
A previous resident had a good-sized vegetable garden there many years ago, but it is overgrown and in great need of repair. A rusting iron skeleton of hoops cover a large bed that will soon support a plastic cover protecting the plants beneath. The basics are there, and it offers great potential.

The forgotten garden

Huge stands of scrub oak cover the lot in intertwining masses. Dying, spindly pines and harshly-hacked junipers fill forgotten spaces. Ignored lawns are now nothing but eroding dirt. Supposedly-decorative rock smothers large spans of abused soil. It is a perfect gardening palette and I'm thrilled for the opportunity to create a beautiful landscape.

Already I've spent long minutes standing, observing, and imagining. The ground is currently frozen, but the process of clearing the brush, cutting straggly trees, and terracing the slopes will start soon. As soon as the soil is warm enough to work, amending and improving begin.

The barren back yard

As with past gardens, I'll document each step. I'll discuss the missteps and successes. I expect to make mistakes along the way, but also to learn many new things. On these pages, photos and words will share my thoughts and spread my knowledge.

This will be my biggest gardening undertaking to date. An entire landscape screams to be transformed. In the vegetable garden the positive transformation may be quickest to observe, but it won't be the only space encountering a new life. This effort will be years in the making and I anticipate the results with joy.

Join me as the adventure begins.
Dreaming of, planning, and building a garden are my favorite aspects of gardening. I like selecting plants, tending to them, and enjoying the fruits of my labors, but it's the actual garden development and construction that gives me the most satisfaction. Standing quietly, looking at a bare spot for hours or days, and envisioning the potential that lies in the soil offers me a true connection with the process of creation, growth, and fulfillment.

Many flower, grass, and xeriscape beds have adorned my landscape over the years and planning the steps through completion have evolved with each of them. Staking out a space and bringing it to bloom is fascinating, but it is in the development of vegetable gardens that my true gardening spirit soars.

I've enjoyed the effort and success of two major vegetable gardens. One began as a rock-covered slope that evolved into a productive, terraced, lush and verdant space. Over the course of eight years it progressed from barren, sandy soil to an amalgam of beneficial amendments producing healthy plants in a challenging environment.

The gardening site in the beginning

The finished garden

The second garden began as a sun-baked patch of prairie sod and evolved into a deer-resistant, biochar-infused, raised-bed nirvana at 7,500 feet elevation. Three years of labor have just begun to lay the foundation for future growth.

The starting point

A transformed space

Now I have the opportunity to birth a third vegetable garden. Last week we closed the contract on a house back in the city of Colorado Springs and will begin the move in a few months. The new garden spot will be a full 1,000 feet lower in elevation and grant me two to four extra weeks in the growing season. It too has deer and a new challenge, rabbits.

A bunny in the front yard

A previous resident had a good-sized vegetable garden there many years ago, but it is overgrown and in great need of repair. A rusting iron skeleton of hoops cover a large bed that will soon support a plastic cover protecting the plants beneath. The basics are there, and it offers great potential.

The forgotten garden

Huge stands of scrub oak cover the lot in intertwining masses. Dying, spindly pines and harshly-hacked junipers fill forgotten spaces. Ignored lawns are now nothing but eroding dirt. Supposedly-decorative rock smothers large spans of abused soil. It is a perfect gardening palette and I'm thrilled for the opportunity to create a beautiful landscape.

Already I've spent long minutes standing, observing, and imagining. The ground is currently frozen, but the process of clearing the brush, cutting straggly trees, and terracing the slopes will start soon. As soon as the soil is warm enough to work, amending and improving begin.

The barren back yard

As with past gardens, I'll document each step. I'll discuss the missteps and successes. I expect to make mistakes along the way, but also to learn many new things. On these pages, photos and words will share my thoughts and spread my knowledge.

This will be my biggest gardening undertaking to date. An entire landscape screams to be transformed. In the vegetable garden the positive transformation may be quickest to observe, but it won't be the only space encountering a new life. This effort will be years in the making and I anticipate the results with joy.

Join me as the adventure begins.

Saturday, July 7, 2012

How to Thin Plants

Thinning plants in your vegetable garden can lead to bigger, better harvests. When plants are crowded with others they compete for water, sun, and nutrients and tend to be stunted and unproductive. When plants have plenty of room to grow they're more likely to perform well. Thinning plants also provides improved air circulation, helping reduce the likelihood of fungal diseases. Gardeners can give their plants the best chance for success by removing competition; this is thinning out the garden bed.

Thinning should not be confused with pruning. Pruning is the practice of removing branches and parts of a specific plant, thinning is removing the entire plant.

Carrots often need thinning

When you thin plants choose an appropriate method of removal. Small seedlings can be pulled from the ground. But be cognizant of nearby plants. If you yank one plant you may disturb the roots of its neighbor and effectively destroy both plants.

If plants are close together and you suspect pulling one of them will affect another, cut the plant to be thinned. Pruning shears or small scissors work well to cut the stem close to the ground. Cucumbers, beans, peas, squash, and melons have tender roots and are best thinned by cutting if the plants are anywhere near each other.

Thinning out a crowding cucumber

Plants that sit alone can be dug up with a trowel or shovel. Digging up a plant may provide the opportunity to transplant it to another location. I'll often thin out my flower beds and transplant the thinned seedlings to another part of the bed or pot them to be given away.

Thick groupings of plants like lettuce, spinach, and other greens can be thinned with a rake. When the plants are about an inch tall lightly drag a rake across the soil surface. The tines will remove some of the small plants while leaving others spaced apart.

When determining how to thin and how much space to provide, think about the final size of the plant.

Seed packets often provide guidance for thinning. A carrot seed packet says to thin to 1 to 3 inches; carrots are narrow and don't spread so you only need enough space for the big root to grow. An onion seed packet says to thin to 2 to 5 inches; onions grow bigger than carrots and need more room between them. Lettuce may need 8 or 10 inches, or more, depending on the size of the mature head.


Big, vining plants like squash take up a lot of garden space and thinning them enables the gardener to direct the growth. Thinning also controls the future harvest. I planted six zucchini seeds but I only want two plants; six plants would produce more zucchini than I could ever use while two is very manageable. The strongest, best-spaced plants remain.

These squash are too close together

Plants can be thinned at any stage of their life cycle, but it's most beneficial to do it when they're young. After the second set of true leaves emerges, seedlings are usually strong enough to survive. That's a good time to decide which ones stay and which ones go. Thinning small plants before they stunt the growth of a neighbor is better than waiting until after they become a problem.

You can delay thinning edible plants like lettuce, spinach, and beets until the leaves are big enough for a salad. Thin these out to give room for the remaining plants and then use them in the kitchen. Root crops like carrots, radishes, and turnips will be quite tasty when small; thin out these plants periodically at different sizes and eat them too.

I often conduct two phases of thinning. I'll remove seedlings before they stunt the growth of their neighbors and then wait a few weeks for the plants to get healthy and strong. Then I thin a second time to choose the strongest plants with the best spacing for the bed. This works particularly well for plants like squash and cucumbers when I want the biggest and healthiest plants headed into my short growing season.

The same squash, thinned once, will be thinned again

It's best to thin in the early evening with the soil damp. Damp soil allows small plants to be pulled easily and the absence of harsh sun allows the remaining plants to get used to their new conditions before immediate exposure to heat and light. Watering well after thinning a bed also gives the remaining plants an extra boost along with their newfound spacing.

It's possible to plant a garden and never thin out anything. Sowing seeds and placing transplants with perfect spacing between them means you don't need to remove overcrowded plantings. This can work well for big seeds like pumpkins and plants like tomatoes and peppers. I place them in my garden where I want them and wait for the harvest. I sow my beans and peas in a perfectly spaced grid that allows them to grow up a trellis; their seeds are big and easy to place. Blocks of corn are planted with ideal spacing too.

Many other seeds like carrots, lettuce, onions, and spinach are sown randomly in rows and then thinned out after the plants emerge. The seeds are too small to place with exact measurement and it's easier to wait to thin after germination reveals which small plants need to be removed. Other seeds like beets are easy to place but multiple plants will emerge from a single seed and then need to be thinned.

Plants with bigger seeds like cucumbers, melons, and squash are often sown closer together than the final plants will be. Varying rates of germination, insect damage, and uneven sowing means some plants will start off better than others. It's common to plant six of these kind of seeds in a mound, get four or five that grow, and then reduce them to two or three plants. This allows you to choose the biggest and best plants for that garden area.

This year I planted many, many pickling cucumber seeds in a raised bed. I've had problems in the past with low germination rates, sun and hail damage, and insects eating seedlings. Extra attention by me, and gentle, warm weather resulted in more than 80 plants emerging. That's many more than that bed can support so about 75 percent need to be thinned out. The remaining 20 plants should provide plenty of cucumbers. Because they won't have to compete for water, sun, and nutrients, those 20 plants will produce more fruit than 80 overcrowded plants in the same space.

Too many cucumbers for one bed

All of those seeds came from the same packet. Seed packets may provide dozens of seeds when you only need a handful of plants. Because seeds are only viable for one or two seasons it makes sense to plant many of them and select the ones you want after the plants begin to grow.


Emotionally, it can be difficult to thin out healthy plants. Most of us work hard to get our plants to grow and then we have to intentionally undo our labor. That's one reason I transplant the thinned out plants when I can. For those who are hesitant to thin, try an experiment. Thin half of a bed and let the other half grow as sown. At harvest or the end of the season, compare the two sections. Chances are the thinned half will be healthier and more productive.

When the thinned out plants find a place in the kitchen or compost pile you can gather solace by knowing that they served a purpose in the garden.

Like weeding, thinning is a necessary activity to keep garden plants healthy and productive. When done properly the beneficial results will be obvious.
Thinning plants in your vegetable garden can lead to bigger, better harvests. When plants are crowded with others they compete for water, sun, and nutrients and tend to be stunted and unproductive. When plants have plenty of room to grow they're more likely to perform well. Thinning plants also provides improved air circulation, helping reduce the likelihood of fungal diseases. Gardeners can give their plants the best chance for success by removing competition; this is thinning out the garden bed.

Thinning should not be confused with pruning. Pruning is the practice of removing branches and parts of a specific plant, thinning is removing the entire plant.

Carrots often need thinning

When you thin plants choose an appropriate method of removal. Small seedlings can be pulled from the ground. But be cognizant of nearby plants. If you yank one plant you may disturb the roots of its neighbor and effectively destroy both plants.

If plants are close together and you suspect pulling one of them will affect another, cut the plant to be thinned. Pruning shears or small scissors work well to cut the stem close to the ground. Cucumbers, beans, peas, squash, and melons have tender roots and are best thinned by cutting if the plants are anywhere near each other.

Thinning out a crowding cucumber

Plants that sit alone can be dug up with a trowel or shovel. Digging up a plant may provide the opportunity to transplant it to another location. I'll often thin out my flower beds and transplant the thinned seedlings to another part of the bed or pot them to be given away.

Thick groupings of plants like lettuce, spinach, and other greens can be thinned with a rake. When the plants are about an inch tall lightly drag a rake across the soil surface. The tines will remove some of the small plants while leaving others spaced apart.

When determining how to thin and how much space to provide, think about the final size of the plant.

Seed packets often provide guidance for thinning. A carrot seed packet says to thin to 1 to 3 inches; carrots are narrow and don't spread so you only need enough space for the big root to grow. An onion seed packet says to thin to 2 to 5 inches; onions grow bigger than carrots and need more room between them. Lettuce may need 8 or 10 inches, or more, depending on the size of the mature head.


Big, vining plants like squash take up a lot of garden space and thinning them enables the gardener to direct the growth. Thinning also controls the future harvest. I planted six zucchini seeds but I only want two plants; six plants would produce more zucchini than I could ever use while two is very manageable. The strongest, best-spaced plants remain.

These squash are too close together

Plants can be thinned at any stage of their life cycle, but it's most beneficial to do it when they're young. After the second set of true leaves emerges, seedlings are usually strong enough to survive. That's a good time to decide which ones stay and which ones go. Thinning small plants before they stunt the growth of a neighbor is better than waiting until after they become a problem.

You can delay thinning edible plants like lettuce, spinach, and beets until the leaves are big enough for a salad. Thin these out to give room for the remaining plants and then use them in the kitchen. Root crops like carrots, radishes, and turnips will be quite tasty when small; thin out these plants periodically at different sizes and eat them too.

I often conduct two phases of thinning. I'll remove seedlings before they stunt the growth of their neighbors and then wait a few weeks for the plants to get healthy and strong. Then I thin a second time to choose the strongest plants with the best spacing for the bed. This works particularly well for plants like squash and cucumbers when I want the biggest and healthiest plants headed into my short growing season.

The same squash, thinned once, will be thinned again

It's best to thin in the early evening with the soil damp. Damp soil allows small plants to be pulled easily and the absence of harsh sun allows the remaining plants to get used to their new conditions before immediate exposure to heat and light. Watering well after thinning a bed also gives the remaining plants an extra boost along with their newfound spacing.

It's possible to plant a garden and never thin out anything. Sowing seeds and placing transplants with perfect spacing between them means you don't need to remove overcrowded plantings. This can work well for big seeds like pumpkins and plants like tomatoes and peppers. I place them in my garden where I want them and wait for the harvest. I sow my beans and peas in a perfectly spaced grid that allows them to grow up a trellis; their seeds are big and easy to place. Blocks of corn are planted with ideal spacing too.

Many other seeds like carrots, lettuce, onions, and spinach are sown randomly in rows and then thinned out after the plants emerge. The seeds are too small to place with exact measurement and it's easier to wait to thin after germination reveals which small plants need to be removed. Other seeds like beets are easy to place but multiple plants will emerge from a single seed and then need to be thinned.

Plants with bigger seeds like cucumbers, melons, and squash are often sown closer together than the final plants will be. Varying rates of germination, insect damage, and uneven sowing means some plants will start off better than others. It's common to plant six of these kind of seeds in a mound, get four or five that grow, and then reduce them to two or three plants. This allows you to choose the biggest and best plants for that garden area.

This year I planted many, many pickling cucumber seeds in a raised bed. I've had problems in the past with low germination rates, sun and hail damage, and insects eating seedlings. Extra attention by me, and gentle, warm weather resulted in more than 80 plants emerging. That's many more than that bed can support so about 75 percent need to be thinned out. The remaining 20 plants should provide plenty of cucumbers. Because they won't have to compete for water, sun, and nutrients, those 20 plants will produce more fruit than 80 overcrowded plants in the same space.

Too many cucumbers for one bed

All of those seeds came from the same packet. Seed packets may provide dozens of seeds when you only need a handful of plants. Because seeds are only viable for one or two seasons it makes sense to plant many of them and select the ones you want after the plants begin to grow.


Emotionally, it can be difficult to thin out healthy plants. Most of us work hard to get our plants to grow and then we have to intentionally undo our labor. That's one reason I transplant the thinned out plants when I can. For those who are hesitant to thin, try an experiment. Thin half of a bed and let the other half grow as sown. At harvest or the end of the season, compare the two sections. Chances are the thinned half will be healthier and more productive.

When the thinned out plants find a place in the kitchen or compost pile you can gather solace by knowing that they served a purpose in the garden.

Like weeding, thinning is a necessary activity to keep garden plants healthy and productive. When done properly the beneficial results will be obvious.

Thursday, June 28, 2012

Wildfire Mitigation for Homes

The enormous power of wildfires can be devastating. While much of the Rocky Mountain region confronts an historic fire season, tragic lessons are being learned. Many of us living in urban neighborhoods used to think we were safe when grasslands and forests burned near us, but the firestorm that engulfed West Colorado Springs proved those assumptions wrong.

Crack fire crews were ready, air tankers had dropped tons of fire retardant slurry, national experts put a good defensive plan in place, and sudden, erratic, unanticipated 65 mile per hour winds made all of that irrelevant. Entire neighborhoods were erased in minutes. A firestorm overwhelmed all preparations and incinerated hundreds of houses. These weren't houses sitting solitary in a forest. They were homes sitting side by side along wide streets with sidewalks, playgrounds, and fenced backyards.

I was in Colorado Springs the afternoon of June 26, 2012, and felt sickened by the sight of flames cresting the ridge line that was perceived by all of us as a critical border between the city and the threat beyond. I wasn't overly worried because I knew the fire crews were ready based on the many updates we were following on the news channels. Upon arriving home, 20 miles east of the danger, I told my wife the fire was worse. It was a sorrowful understatement.

The best-trained, professional, defensive fire teams in the world can be defeated when Mother Nature adds enormous destructive energy to an already devastating force of nature, but those events aren't common. The Colorado Springs fire is being described by career firefighters as"epic", with growth patterns and expansive actions previously unseen.

This tragedy has many of us reviewing our own homes and neighborhoods with an eye toward the threat of fire. The idea of "wildfire mitigation" was previously unknown or ignored by many homeowners, but now is the discussion topic at the dinner table.

A wildfire is an uncontrolled burning of grasslands and woodlands, or prairies and forests. The large majority of urban settings are still safe from wildfires, but houses and neighborhoods that border zones of bone-dry vegetation should be aware of practices to reduce the fire threat. Wildfire mitigation for a homeowner involves taking actions to lessen or eliminate the potential damage from a wildfire.

A primary factor in determining a home's ability to survive a wildfire is the "defensible space" around it. This defensible space is the area of vegetation around a building that can either hinder or fuel a fire. Gardeners are uniquely qualified in determining the appropriateness of such vegetation.

A house is more likely to resist a wildfire if overgrown grass, dried brush, and overhanging trees are thinned or removed from the immediate vicinity of the building. With no or little fuel, a wildfire's progress can be slowed when it approaches.

Extending a clear space around a structure provides firefighters room to work as they fight flames, keeping a structure fire or a wildfire from moving to other structures or to surrounding woodlands. Giving the trained defenders a defensible space can make the difference between success and failure.

When viewing the area around your home and analyzing the defensible space, think horizontally and vertically. The horizontal space runs across the ground and encompasses low vegetation that could be potential fire fuel. The vertical space runs from the ground to the top of bushes and trees that might ignite. Vegetation that provides both high horizontal and vertical fuel potential poses the biggest threat; thick stands of brush and tightly-packed trees can be hazardous.

Mitigation of wildfire for homes involves disrupting the natural continuity of these horizontal and vertical fuel sources. Thinning large shrubs and trees so there is at least 10 feet between crowns reduces the potential of wildfire moving from one plant to another. Removing low branches and smaller plants under a tree removes these "ladder fuels" that can transform a low, grass fire into a high, tree fire.

A few years ago I was fortunate to receive forestry training as part of our Master Gardener program. It included education on wildfire mitigation and creating defensible zones around houses. I garden using many of those concepts. I've worked to prune lower branches off trees near the house to a height of about 10 feet. I don't plant shrubs near trees. I keep the grass within 100 feet of the house no higher than six inches. Dead trees and branches are removed quickly. No logs or wood are stored within five feet of the house and nothing is stored under the deck.

Even with my education and awareness a wildfire mitigation analysis shows deficiencies and potential hazard zones in my landscape. I was aware of some of them, overlooked others, and discovered new concerns.

My gardening activities focused on my backyard. Many earlier problems with potential wildfire fuels were corrected. It now offers a substantial defensive space and is maintained well. Little needs to be done there.

Good defensible space in the back

The front of the house has the road and gravel driveway as fire barriers and the old Ponderosa Pine is pruned up to about 15 feet; it is not threatened by a slow-moving, low fire. But there are Aspens and shrubs that abut the exterior walls. They are thick and not pruned as well as they should be. We like the way they look but in a wildfire situation they pose a danger to our home. This is the first place in our landscape where a decision needs to be made between aesthetics and safety. It's difficult sacrificing landscape plants, but it may be necessary to mitigate fire danger.

Obvious fire mitigation concerns

A similar situation exists on the north side of our house. Open pasture leads to the lawn, a thick stand of Aspens grows about 20 feet from the structure, overgrown bushes rest against the house, and a lone Ponderosa Pine rises within 10 feet of the deck and house. Though the lower branches are removed, the tree poses a serious threat. If it were to catch fire from a wind-blown ember, it threatens both the wood deck and the house. It is now a priority for removal.

Close growth is the biggest issue

The worst situation is on the south side. Our neighbor's thick brush and numerous trees flow into a space filled with pine trees on our property that grow right up to the house. Their branches intermingle. There is nothing to stop flames from spreading between them and to our roof.

No defensible space and obstructed mitigation zones

The first defensible zone around a house should extend at least 15 feet around it. All flammable vegetation should be removed from this zone for maximum fire mitigation. The second zone extends to at least 75 feet. Within this zone the continuity and arrangement of vegetation should be adjusted to reduce fuel potential. The south side of my home breaks all the rules of creating a wildfire-defensible space.

Many people move to the country or into the forest because they enjoy the scenery and wish to be engulfed by the plants and trees. No one expects that their home will be annihilated by a wildfire. We are now confronted by this obvious possibility.

In the early days of the Waldo Canyon fire as it threatened Colorado Springs, news crews and commentators highlighted the structures that remained immune to the widening fire lines. These homes were in the heart of the forest but they had obvious tree-free zones extending well beyond their walls. The grasses caught fire as the onslought approached but they were easy to extinguish. These homeowners who practiced serious wildfire mitigation practices saw their houses spared.

Creating defensible zones as part of wildfire mitigation works. It needs to exist on a large scale to be most effective. And an entire neighborhood needs to be involved. You can do what you can to reduce fire threat in your landscape but a neighbor's recklessness can still spell disaster.

I'm working with our homeowner's association, of which I'm a board member, to address this issue in our community. Already we're discussing plans for teams to help neighbors remove dead trees and brush if they're not able to do it on their own.

Many fire stations offer help in fire mitigation. If they have the resources they'll be happy to examine your landscape and identify problems. Believe me, it is beneficial for them to have defensible space around the homes they protect.

Mother Nature always has the last word. Even the best-defended home can be lost in a firestorm, as we saw this week. In a typical wildfire, wise mitigation practices can prevent loss. Educating yourself becomes critical when confronted by sustained drought as much of the U.S. is facing. High winds  and catastrophic low humidity increase danger. When the fire approaches it is too late to prepare your landscape. Think and act in advance to protect your home.

For more information read these fact sheets from Colorado State University:

Creating Wildfire-Defensible Zones, no. 6.302
Fire-Resistant Landscaping, no. 6.303
Forest Home Fire Safety, no 6.304
Firewise Plant Materials, no. 6.305


The enormous power of wildfires can be devastating. While much of the Rocky Mountain region confronts an historic fire season, tragic lessons are being learned. Many of us living in urban neighborhoods used to think we were safe when grasslands and forests burned near us, but the firestorm that engulfed West Colorado Springs proved those assumptions wrong.

Crack fire crews were ready, air tankers had dropped tons of fire retardant slurry, national experts put a good defensive plan in place, and sudden, erratic, unanticipated 65 mile per hour winds made all of that irrelevant. Entire neighborhoods were erased in minutes. A firestorm overwhelmed all preparations and incinerated hundreds of houses. These weren't houses sitting solitary in a forest. They were homes sitting side by side along wide streets with sidewalks, playgrounds, and fenced backyards.

I was in Colorado Springs the afternoon of June 26, 2012, and felt sickened by the sight of flames cresting the ridge line that was perceived by all of us as a critical border between the city and the threat beyond. I wasn't overly worried because I knew the fire crews were ready based on the many updates we were following on the news channels. Upon arriving home, 20 miles east of the danger, I told my wife the fire was worse. It was a sorrowful understatement.

The best-trained, professional, defensive fire teams in the world can be defeated when Mother Nature adds enormous destructive energy to an already devastating force of nature, but those events aren't common. The Colorado Springs fire is being described by career firefighters as"epic", with growth patterns and expansive actions previously unseen.

This tragedy has many of us reviewing our own homes and neighborhoods with an eye toward the threat of fire. The idea of "wildfire mitigation" was previously unknown or ignored by many homeowners, but now is the discussion topic at the dinner table.

A wildfire is an uncontrolled burning of grasslands and woodlands, or prairies and forests. The large majority of urban settings are still safe from wildfires, but houses and neighborhoods that border zones of bone-dry vegetation should be aware of practices to reduce the fire threat. Wildfire mitigation for a homeowner involves taking actions to lessen or eliminate the potential damage from a wildfire.

A primary factor in determining a home's ability to survive a wildfire is the "defensible space" around it. This defensible space is the area of vegetation around a building that can either hinder or fuel a fire. Gardeners are uniquely qualified in determining the appropriateness of such vegetation.

A house is more likely to resist a wildfire if overgrown grass, dried brush, and overhanging trees are thinned or removed from the immediate vicinity of the building. With no or little fuel, a wildfire's progress can be slowed when it approaches.

Extending a clear space around a structure provides firefighters room to work as they fight flames, keeping a structure fire or a wildfire from moving to other structures or to surrounding woodlands. Giving the trained defenders a defensible space can make the difference between success and failure.

When viewing the area around your home and analyzing the defensible space, think horizontally and vertically. The horizontal space runs across the ground and encompasses low vegetation that could be potential fire fuel. The vertical space runs from the ground to the top of bushes and trees that might ignite. Vegetation that provides both high horizontal and vertical fuel potential poses the biggest threat; thick stands of brush and tightly-packed trees can be hazardous.

Mitigation of wildfire for homes involves disrupting the natural continuity of these horizontal and vertical fuel sources. Thinning large shrubs and trees so there is at least 10 feet between crowns reduces the potential of wildfire moving from one plant to another. Removing low branches and smaller plants under a tree removes these "ladder fuels" that can transform a low, grass fire into a high, tree fire.

A few years ago I was fortunate to receive forestry training as part of our Master Gardener program. It included education on wildfire mitigation and creating defensible zones around houses. I garden using many of those concepts. I've worked to prune lower branches off trees near the house to a height of about 10 feet. I don't plant shrubs near trees. I keep the grass within 100 feet of the house no higher than six inches. Dead trees and branches are removed quickly. No logs or wood are stored within five feet of the house and nothing is stored under the deck.

Even with my education and awareness a wildfire mitigation analysis shows deficiencies and potential hazard zones in my landscape. I was aware of some of them, overlooked others, and discovered new concerns.

My gardening activities focused on my backyard. Many earlier problems with potential wildfire fuels were corrected. It now offers a substantial defensive space and is maintained well. Little needs to be done there.

Good defensible space in the back

The front of the house has the road and gravel driveway as fire barriers and the old Ponderosa Pine is pruned up to about 15 feet; it is not threatened by a slow-moving, low fire. But there are Aspens and shrubs that abut the exterior walls. They are thick and not pruned as well as they should be. We like the way they look but in a wildfire situation they pose a danger to our home. This is the first place in our landscape where a decision needs to be made between aesthetics and safety. It's difficult sacrificing landscape plants, but it may be necessary to mitigate fire danger.

Obvious fire mitigation concerns

A similar situation exists on the north side of our house. Open pasture leads to the lawn, a thick stand of Aspens grows about 20 feet from the structure, overgrown bushes rest against the house, and a lone Ponderosa Pine rises within 10 feet of the deck and house. Though the lower branches are removed, the tree poses a serious threat. If it were to catch fire from a wind-blown ember, it threatens both the wood deck and the house. It is now a priority for removal.

Close growth is the biggest issue

The worst situation is on the south side. Our neighbor's thick brush and numerous trees flow into a space filled with pine trees on our property that grow right up to the house. Their branches intermingle. There is nothing to stop flames from spreading between them and to our roof.

No defensible space and obstructed mitigation zones

The first defensible zone around a house should extend at least 15 feet around it. All flammable vegetation should be removed from this zone for maximum fire mitigation. The second zone extends to at least 75 feet. Within this zone the continuity and arrangement of vegetation should be adjusted to reduce fuel potential. The south side of my home breaks all the rules of creating a wildfire-defensible space.

Many people move to the country or into the forest because they enjoy the scenery and wish to be engulfed by the plants and trees. No one expects that their home will be annihilated by a wildfire. We are now confronted by this obvious possibility.

In the early days of the Waldo Canyon fire as it threatened Colorado Springs, news crews and commentators highlighted the structures that remained immune to the widening fire lines. These homes were in the heart of the forest but they had obvious tree-free zones extending well beyond their walls. The grasses caught fire as the onslought approached but they were easy to extinguish. These homeowners who practiced serious wildfire mitigation practices saw their houses spared.

Creating defensible zones as part of wildfire mitigation works. It needs to exist on a large scale to be most effective. And an entire neighborhood needs to be involved. You can do what you can to reduce fire threat in your landscape but a neighbor's recklessness can still spell disaster.

I'm working with our homeowner's association, of which I'm a board member, to address this issue in our community. Already we're discussing plans for teams to help neighbors remove dead trees and brush if they're not able to do it on their own.

Many fire stations offer help in fire mitigation. If they have the resources they'll be happy to examine your landscape and identify problems. Believe me, it is beneficial for them to have defensible space around the homes they protect.

Mother Nature always has the last word. Even the best-defended home can be lost in a firestorm, as we saw this week. In a typical wildfire, wise mitigation practices can prevent loss. Educating yourself becomes critical when confronted by sustained drought as much of the U.S. is facing. High winds  and catastrophic low humidity increase danger. When the fire approaches it is too late to prepare your landscape. Think and act in advance to protect your home.

For more information read these fact sheets from Colorado State University:

Creating Wildfire-Defensible Zones, no. 6.302
Fire-Resistant Landscaping, no. 6.303
Forest Home Fire Safety, no 6.304
Firewise Plant Materials, no. 6.305


Monday, May 7, 2012

Microclimates in the Garden

Microclimates give gardeners an opportunity to grow plants that might not normally be successful in their landscape. Microclimates can also spell doom for plants that should grow well. As in the real estate game, in gardening it's all about location, location, location.

Every yard has spots that react differently to weather factors

A microclimate is a geographical area with a different climate than the larger area surrounding it. The effect of localized weather varies in microclimates. Some microclimates cover miles of territory, but for our garden discussion we're talking about garden spots that may only be a few feet wide. Every season offers the opportunity to find microclimates in your garden (see my articles: "Look for Microclimates in the Garden", Jan 13, 2011; and "Microclimates in Summer", July 8, 2011). Spring is a good time to try and identify some of the microclimates in your garden that you may not notice at other times.

Gardening is a long-term activity and by noting changes in your garden throughout the year you can use your time and effort to provide the best environment for your plants. Microclimates exist everywhere but until you notice their effects on you and your plants you may be wasting valuable resources.

Some microclimates are obvious. Maybe there's a spot in your yard that is always high and dry; snow melts first in that spot, grass dries out and needs more water in that spot, or maybe every shrub you plant dies in that spot. Pausing for a little analysis may reveal it is always sunny, windy, and exposed. That's a microclimate.

On the other end of the spectrum think about the garden bed that is always wet and cold. Maybe its a low spot under some trees that never sees sun and never dries out; maybe it's the spot that always has the last pile of snow in spring. That's a microclimate.

These two microclimates may exist mere feet from each other but to plants they may as well be separated by miles. A plant that can grow in one of them can't grow in the other. It's up to you the gardener to recognize the differences and act accordingly.

My wife and I have noticed an interesting microclimate in our yard. We have three stands of Aspens that are each only separated by about 50 or 60 feet (15-18 meters). The stand in the front yard always buds out first. Two or three weeks later as those trees have full leaves, the second stand begins to show signs of green. Another two or three weeks go by before the third stand finally begins to leaf out.

Full leaves on the right, new leaves in the middle, no leaves on the left

An analysis of the landscape reveals a minor grade in the landscape; the last Aspen stand to grow is in the lowest elevation. The upper stand also gets a little more sunshine; the lower stand is shaded by trees and the house late in the day. It's also likely that the lower stand is more exposed to wind, common in the spring; the two upper stands have some wind protection from nearby structures and other trees.

The bare trees on the left are noticeably lower in elevation

Recognizing this microclimate is important to my gardening and plant selection. And I've made mistakes by not analyzing it earlier. Initially I planted Irises under the trees in the lower stand. They get full sun in early spring before the trees leaf out and I thought that would be enough for their success. The problem comes in autumn. As you might guess, the upper Aspen stands drop their leaves first and this lower stand is the last to lose leaves in fall. That means that the Irises are still shaded when they should be getting sun to nourish their rhizomes. I never get the flowers I should because the Iris rhizomes aren't nourished by sunlight as well as they should be.

This microclimate analysis changed my approach to plant selection. First, I planted new lavender plants near the upper Aspen stand. The slightly improved sun exposure helped those lavender plants grow better than others in the back yard. This year I've planted Coral Bells (Heuchera) in that lower spot. Coral Bells like sun when it's cold and some shade when it's hot, exactly what the location offers.

Without a microclimate analysis I might spend years fertilizing and babying the Irises and other plants that were never really suited for that garden bed. Now I can focus on the proper plants for better success.

Another microclimate, that I created, is evident in my stone patio. I wanted a spot to support the growing requirements of lavender and other high desert plants. I chose a location that gets full sun and build a raised, stone patio. It is now the spot that warms quickly in spring and where snow melts first. The lavender, sedum, thyme, and iceplants are thriving in a spot designed for them.

The warmer stone helps nearby plants in early spring

I chose a nice location with full sun for my vegetable garden. But even in this select area microclimates exist. The raised beds are built on a slope and the upper beds are a few feet higher in elevation than the lower. The upper beds have more exposure to wind and receive late-day shade before the others. Last year tomato plants in the lower beds did better than tomato plants just a few feet away; the wind and shade made a difference even though it is barely noticeable to me. The plants obviously noticed.

A slope with trees can create many microclimates

Look at how your garden wakes up in spring. Note the different growth rates of plants just a few feet apart. Spot elevation, sun, and wind variations in your landscape. Take a few minutes to analyze why some plants do well while others struggle.

By thinking about microclimates in your garden and acting to match plants with the best growing environment you can improve your garden's success. We often don't think much about a minor difference in temperature, sun, or shade, but to tender plants it can mean the difference between life and death.

Before you put new plants in a garden bed and before you sow seeds notice the year-round characteristics of that spot of ground. It may be perfect for young plants in the spring but does it offer the best environment and microclimate later in the plant's life cycle? The best gardening practices look into the future. It may sound difficult but it begins by thinking about how little differences in localized climate exists from one section of your garden to another. By spotting these changes you can use microclimates to your advantage.

Link to:

"Look for Microclimates in the Garden"
"Microclimates in Summer"

Microclimates give gardeners an opportunity to grow plants that might not normally be successful in their landscape. Microclimates can also spell doom for plants that should grow well. As in the real estate game, in gardening it's all about location, location, location.

Every yard has spots that react differently to weather factors

A microclimate is a geographical area with a different climate than the larger area surrounding it. The effect of localized weather varies in microclimates. Some microclimates cover miles of territory, but for our garden discussion we're talking about garden spots that may only be a few feet wide. Every season offers the opportunity to find microclimates in your garden (see my articles: "Look for Microclimates in the Garden", Jan 13, 2011; and "Microclimates in Summer", July 8, 2011). Spring is a good time to try and identify some of the microclimates in your garden that you may not notice at other times.

Gardening is a long-term activity and by noting changes in your garden throughout the year you can use your time and effort to provide the best environment for your plants. Microclimates exist everywhere but until you notice their effects on you and your plants you may be wasting valuable resources.

Some microclimates are obvious. Maybe there's a spot in your yard that is always high and dry; snow melts first in that spot, grass dries out and needs more water in that spot, or maybe every shrub you plant dies in that spot. Pausing for a little analysis may reveal it is always sunny, windy, and exposed. That's a microclimate.

On the other end of the spectrum think about the garden bed that is always wet and cold. Maybe its a low spot under some trees that never sees sun and never dries out; maybe it's the spot that always has the last pile of snow in spring. That's a microclimate.

These two microclimates may exist mere feet from each other but to plants they may as well be separated by miles. A plant that can grow in one of them can't grow in the other. It's up to you the gardener to recognize the differences and act accordingly.

My wife and I have noticed an interesting microclimate in our yard. We have three stands of Aspens that are each only separated by about 50 or 60 feet (15-18 meters). The stand in the front yard always buds out first. Two or three weeks later as those trees have full leaves, the second stand begins to show signs of green. Another two or three weeks go by before the third stand finally begins to leaf out.

Full leaves on the right, new leaves in the middle, no leaves on the left

An analysis of the landscape reveals a minor grade in the landscape; the last Aspen stand to grow is in the lowest elevation. The upper stand also gets a little more sunshine; the lower stand is shaded by trees and the house late in the day. It's also likely that the lower stand is more exposed to wind, common in the spring; the two upper stands have some wind protection from nearby structures and other trees.

The bare trees on the left are noticeably lower in elevation

Recognizing this microclimate is important to my gardening and plant selection. And I've made mistakes by not analyzing it earlier. Initially I planted Irises under the trees in the lower stand. They get full sun in early spring before the trees leaf out and I thought that would be enough for their success. The problem comes in autumn. As you might guess, the upper Aspen stands drop their leaves first and this lower stand is the last to lose leaves in fall. That means that the Irises are still shaded when they should be getting sun to nourish their rhizomes. I never get the flowers I should because the Iris rhizomes aren't nourished by sunlight as well as they should be.

This microclimate analysis changed my approach to plant selection. First, I planted new lavender plants near the upper Aspen stand. The slightly improved sun exposure helped those lavender plants grow better than others in the back yard. This year I've planted Coral Bells (Heuchera) in that lower spot. Coral Bells like sun when it's cold and some shade when it's hot, exactly what the location offers.

Without a microclimate analysis I might spend years fertilizing and babying the Irises and other plants that were never really suited for that garden bed. Now I can focus on the proper plants for better success.

Another microclimate, that I created, is evident in my stone patio. I wanted a spot to support the growing requirements of lavender and other high desert plants. I chose a location that gets full sun and build a raised, stone patio. It is now the spot that warms quickly in spring and where snow melts first. The lavender, sedum, thyme, and iceplants are thriving in a spot designed for them.

The warmer stone helps nearby plants in early spring

I chose a nice location with full sun for my vegetable garden. But even in this select area microclimates exist. The raised beds are built on a slope and the upper beds are a few feet higher in elevation than the lower. The upper beds have more exposure to wind and receive late-day shade before the others. Last year tomato plants in the lower beds did better than tomato plants just a few feet away; the wind and shade made a difference even though it is barely noticeable to me. The plants obviously noticed.

A slope with trees can create many microclimates

Look at how your garden wakes up in spring. Note the different growth rates of plants just a few feet apart. Spot elevation, sun, and wind variations in your landscape. Take a few minutes to analyze why some plants do well while others struggle.

By thinking about microclimates in your garden and acting to match plants with the best growing environment you can improve your garden's success. We often don't think much about a minor difference in temperature, sun, or shade, but to tender plants it can mean the difference between life and death.

Before you put new plants in a garden bed and before you sow seeds notice the year-round characteristics of that spot of ground. It may be perfect for young plants in the spring but does it offer the best environment and microclimate later in the plant's life cycle? The best gardening practices look into the future. It may sound difficult but it begins by thinking about how little differences in localized climate exists from one section of your garden to another. By spotting these changes you can use microclimates to your advantage.

Link to:

"
Look for Microclimates in the Garden"
"Microclimates in Summer"

Monday, April 30, 2012

When the Last Frost Date Isn't the Last Frost Date

The United States abounds with record high temperatures this month and spring arrived early in many places. I've been enjoying days that are 15 and even 20 degrees above normal for weeks; unusual is an understatement. At a time of year we normally cringe at the thought of more, freezing overnight temperatures, sunscreen and shade are now on my mind. This is a year when the projected official last frost date won't even be close. Maybe.

Late spring frost on apricot flowers

The last frost date for me is still more than two weeks away. That is, the official 90% last frost date is the 15th of May for my area. My garden is at a higher elevation than the city proper so I always add a few days to be safe, but it's close. As I've written before (Mar 18, 2011, "Know Your Last Frost Date"; Mar 29, 2011, "What to Plant Before the Last Frost"; May 13, 2011, "What is the Last Frost Date?"), the "90% last frost date" is the one most often referred to by seed companies, the USDA, NOAA, and anyone else that throws out a date as the last one for gardeners to be concerned about.

Last year I got my last frost on May 15; the model proved true. This year the actual last frost in my garden should be different. In fact, I think the last frost happened yesterday.

Last year's snow in May

Last Frost Dates are determined by taking historical temperature data and finding a symbolic date that meets certain criteria. The "90% last frost date" is the date for a certain area when 90 percent of historical last frosts have already occurred. The "Average Last Frost Date" or "50% last frost date" is the point on the calendar when half of the historical last frosts have already happened. The third type of last frost date is the "10% last frost date"; by this date 10 percent of historical last frosts were final. The key to all of these dates is that they're determined by using historical dates, days that occurred in the past.

For my garden zone, 10 percent of the last frost dates in years past happened by April 24, and 50 percent happened by May 4. Could this be another one of those kind of years?

As far back as I can remember, in my 15 years living here, the last frost happened in May. I always advise local gardeners to wait until late May to plant warm season plants. Many gardeners new to the area learn the hard way about planting too soon in our high-mountain, weather-crazy area.

This year is one of the ones that cause serious gardeners like me to start biting our nails and tearing out our hair. A look at the long-range weather forecast shows we'll be well above freezing for the next 10 days. That puts us very close to the 90% last frost date with no worries. Historically, we can point to previous years like this one when no frost occurred in May.

Then again I can point to years when we had frosts in June. A month is a long time in the weather world. Something could be brewing off the coast of northern Alaska right now that won't be revealed until two or three weeks from now. A blast of Arctic air might descend on my garden when I least expect it. Or not.

The last frost date is just a spot on the calendar for garden planning. It's up to individual gardeners to determine what they do with it. With any mathematical model, some points of data lie well outside the norm. For a date to be considered average (technically the mean), half of statistical points happened before and half happened after. It's nice that we gardeners have the 90% and 10% last frost dates at our disposal to develop a more precise planting plan.

As I look at my calendar, every day without frost puts me closer to the mathematical point when future frost isn't likely to happen. I've passed the 10 percent point and should breeze past the 50 percent point with no problem. The 90 percent point looks very promising.

Does that mean I can relax and plant with no frost concerns? That's a good question and one for which I wish I had the answer. Whatever I choose to do I have to be ready for the consequences... or rewards. Knowing how last frost dates are determined and using that knowledge will help me make an informed decision when it comes to planting.

I've just about convinced myself that this is one of those years when the last frost occurs early. Indications are good that warm days and nights ahead will help my plants. The ground is already warmer than it normally is at this point of the year. The weather trends seem positive.

But I'm not a gambler and I'm not ready to bet everything on a statistical probability. I'll plant tomatoes next week almost a month ahead of normal, but I'll enclose them in plastic season extenders. I'll put some beans in the ground, but only in the beds with protective covering. I'll delay planting squash and pumpkins until I'm absolutely sure the calendar coast is clear.

Usually I wouldn't be considering such measures at the end of April, but this year is different. Sunny days are too inviting to sit back and wait for historical events to happen. Part of being a gardener is trying new things in the garden and by a small measure I'll roll the dice a little. We all experience missteps and minor failures in gardening so I'm ready for the worst, but if my conjecture about the last frost date holds true I'll be able to get a nice jump on the growing season.

I know my last frost date, all three of them actually. I know what they mean. I have experienced the ups and downs of weather's effect on my garden. Also I'm anxious to get my garden growing. This year my last frost date won't be an actual last frost date. That's what I've determined based on the data at hand. Or at least that's what I'm betting on.
The United States abounds with record high temperatures this month and spring arrived early in many places. I've been enjoying days that are 15 and even 20 degrees above normal for weeks; unusual is an understatement. At a time of year we normally cringe at the thought of more, freezing overnight temperatures, sunscreen and shade are now on my mind. This is a year when the projected official last frost date won't even be close. Maybe.

Late spring frost on apricot flowers

The last frost date for me is still more than two weeks away. That is, the official 90% last frost date is the 15th of May for my area. My garden is at a higher elevation than the city proper so I always add a few days to be safe, but it's close. As I've written before (Mar 18, 2011, "Know Your Last Frost Date"; Mar 29, 2011, "What to Plant Before the Last Frost"; May 13, 2011, "What is the Last Frost Date?"), the "90% last frost date" is the one most often referred to by seed companies, the USDA, NOAA, and anyone else that throws out a date as the last one for gardeners to be concerned about.

Last year I got my last frost on May 15; the model proved true. This year the actual last frost in my garden should be different. In fact, I think the last frost happened yesterday.

Last year's snow in May

Last Frost Dates are determined by taking historical temperature data and finding a symbolic date that meets certain criteria. The "90% last frost date" is the date for a certain area when 90 percent of historical last frosts have already occurred. The "Average Last Frost Date" or "50% last frost date" is the point on the calendar when half of the historical last frosts have already happened. The third type of last frost date is the "10% last frost date"; by this date 10 percent of historical last frosts were final. The key to all of these dates is that they're determined by using historical dates, days that occurred in the past.

For my garden zone, 10 percent of the last frost dates in years past happened by April 24, and 50 percent happened by May 4. Could this be another one of those kind of years?

As far back as I can remember, in my 15 years living here, the last frost happened in May. I always advise local gardeners to wait until late May to plant warm season plants. Many gardeners new to the area learn the hard way about planting too soon in our high-mountain, weather-crazy area.

This year is one of the ones that cause serious gardeners like me to start biting our nails and tearing out our hair. A look at the long-range weather forecast shows we'll be well above freezing for the next 10 days. That puts us very close to the 90% last frost date with no worries. Historically, we can point to previous years like this one when no frost occurred in May.

Then again I can point to years when we had frosts in June. A month is a long time in the weather world. Something could be brewing off the coast of northern Alaska right now that won't be revealed until two or three weeks from now. A blast of Arctic air might descend on my garden when I least expect it. Or not.

The last frost date is just a spot on the calendar for garden planning. It's up to individual gardeners to determine what they do with it. With any mathematical model, some points of data lie well outside the norm. For a date to be considered average (technically the mean), half of statistical points happened before and half happened after. It's nice that we gardeners have the 90% and 10% last frost dates at our disposal to develop a more precise planting plan.

As I look at my calendar, every day without frost puts me closer to the mathematical point when future frost isn't likely to happen. I've passed the 10 percent point and should breeze past the 50 percent point with no problem. The 90 percent point looks very promising.

Does that mean I can relax and plant with no frost concerns? That's a good question and one for which I wish I had the answer. Whatever I choose to do I have to be ready for the consequences... or rewards. Knowing how last frost dates are determined and using that knowledge will help me make an informed decision when it comes to planting.

I've just about convinced myself that this is one of those years when the last frost occurs early. Indications are good that warm days and nights ahead will help my plants. The ground is already warmer than it normally is at this point of the year. The weather trends seem positive.

But I'm not a gambler and I'm not ready to bet everything on a statistical probability. I'll plant tomatoes next week almost a month ahead of normal, but I'll enclose them in plastic season extenders. I'll put some beans in the ground, but only in the beds with protective covering. I'll delay planting squash and pumpkins until I'm absolutely sure the calendar coast is clear.

Usually I wouldn't be considering such measures at the end of April, but this year is different. Sunny days are too inviting to sit back and wait for historical events to happen. Part of being a gardener is trying new things in the garden and by a small measure I'll roll the dice a little. We all experience missteps and minor failures in gardening so I'm ready for the worst, but if my conjecture about the last frost date holds true I'll be able to get a nice jump on the growing season.

I know my last frost date, all three of them actually. I know what they mean. I have experienced the ups and downs of weather's effect on my garden. Also I'm anxious to get my garden growing. This year my last frost date won't be an actual last frost date. That's what I've determined based on the data at hand. Or at least that's what I'm betting on.