Link to StumbleUpon

Showing posts with label Greenhouse. Show all posts

Tuesday, July 30, 2013

Sow Cool Season Plants in Summer for a Fall Crop

Two harvests in the same growing season are easy to accomplish. Many gardeners sow and plant in spring, spend summer tending to their crops, harvest in early fall, and then wrap it all up and wait until spring to repeat the same process. With little effort you can double your garden's output with sow, tend, sow, harvest, tend, and then harvest again. Then you can spend winter satisfied that your garden played double duty to produce all it could.

Chard is a great fall crop

In late summer you sow seeds for cool season plants that will grow as temperatures begin to decline. They'll be ready to harvest after the first frosts have appeared and long after the last tomatoes were pulled from the vines. There is no need to create new gardens; you use the same beds you do now.

Cool season crops are primarily the ones that provide leaves, stems, and roots for harvest. These crops include:

Arugula, beets, broccoli, Brussels sprouts, cabbage, carrots, cauliflower, celery, chard, collards, endive, fennel, kale, kohrabi, leeks, lettuce, mustard greens, onions, peas, parsnips, potatoes, radishes, spinach, turnips

Peas, especially snow peas, are good in fall

Many gardeners grow these plants in spring and hope for a slow start to summer so the plants will mature and be ready for harvest before high heat causes them to bolt and their taste turns bitter. We take advantage of their natural ability to tolerate low temperatures by planting early.

We can also use that ability to plant late. The mature plant tolerates the low temperatures of fall, there is no risk of bolting, and many people believe many of these crops taste superior after exposure to frost.

Those of us who sow in early spring and hope the soil has warmed enough to initiate germination are ready for a percentage of our seeds to never grow. Those of us who sow in late summer are pleased that the warm soil provides speedy germination with little seed loss.

Early seed and plant care is different when you plant late. In spring there is less need for extra watering; lower temperatures mean less evaporation and there is always a chance of rain or late snow. In summer, the heat requires more gardener attention to maintaining moist soil conditions for seeds and young plants; you may need to mist or water the plants two or three times a day in harsh sun.

Temperatures above 80F (27C) will cause broccoli and spinach to bolt quickly. Sowing in a shady spot or setting up a row cover can reduce this concern.

Once the plants have a few sets of leaves the need for watering becomes less than in late summer. While early plants need more water to combat the increasing summer heat, later plants require less water as the decreasing temperatures bring comfort. The plants are less stressed in fall. They grow in the conditions they like best; they're called cool season plants for a reason.

As long as the day temperatures remain about 10 to 15 degrees above freezing (40F - 50F, 4C - 10C) you can expect the crops to continue growing and producing. When the day temps remain below 40F (4C) the plants may begin to suffer. Careful harvesting will still produce results. The center of the plant may still have new, tasty leaves while the exterior leaves look frazzled.

Hard freezes, cold days, and icy conditions will adversely affect most cool season crops and will spell the end for your second harvest, but you can delay winter by mulching heavily with straw and using a season extender like cold frames, cloches, or plastic tunnels. I use my hoophouse system to harvest well into November and even December.

Broccoli and beets ready for overnight protection

Some crops like cabbage, kale, and spinach can do well, even in snow. With heavy mulching, beets, leeks, and parsnips can often be overwintered and harvested in spring (I've done this). 

Use your entire vegetable garden for fall planting. If you have a cool-season spring bed for broccoli, spinach, or lettuce and then let that bed remain filled with bolty, straggly, dried plants throughout the summer, rip those plants out and sow again for a fall crop.

Your tomatoes, peppers, and melons will decline in cooling weather. Anticipate their decline and sow seeds among those plants, in the same beds. When the first frost zaps your tomato plant, cut it out and let the cabbage and broccoli growing nearby overtake that space.

Root crops won't be as big as spring plantings, but may be tastier. Try growing small, thumb-sized carrot varieties or harvest them young before the ground freezes. Beet roots will be harvested when they're just a few inches big, but the beet leaves can be harvested continually.

Beet leaves are edible and tasty

Garden pests can be less of a concern for a fall garden. Many insect pests are less active, if not gone, in fall. The weeds will spend all summer attacking aren't active in fall. Even deer seem to be scarce as they make their way to find a winter bed.

While growing a second crop in the same season sounds like extra work, it doesn't need to be. Summer garden beds should be cleaned up before winter so insects don't have a place to overwinter. That clean up works well to prepare the beds for fall crops.

You'll spend a few more days in the garden watering and harvesting, but is that really a bad thing? Fall gardening allows you to do more of what you like and for me that's a good thing.

Link to "Extending Your Growing Season with Mini Greenhouses"
Two harvests in the same growing season are easy to accomplish. Many gardeners sow and plant in spring, spend summer tending to their crops, harvest in early fall, and then wrap it all up and wait until spring to repeat the same process. With little effort you can double your garden's output with sow, tend, sow, harvest, tend, and then harvest again. Then you can spend winter satisfied that your garden played double duty to produce all it could.

Chard is a great fall crop

In late summer you sow seeds for cool season plants that will grow as temperatures begin to decline. They'll be ready to harvest after the first frosts have appeared and long after the last tomatoes were pulled from the vines. There is no need to create new gardens; you use the same beds you do now.

Cool season crops are primarily the ones that provide leaves, stems, and roots for harvest. These crops include:

Arugula, beets, broccoli, Brussels sprouts, cabbage, carrots, cauliflower, celery, chard, collards, endive, fennel, kale, kohrabi, leeks, lettuce, mustard greens, onions, peas, parsnips, potatoes, radishes, spinach, turnips

Peas, especially snow peas, are good in fall

Many gardeners grow these plants in spring and hope for a slow start to summer so the plants will mature and be ready for harvest before high heat causes them to bolt and their taste turns bitter. We take advantage of their natural ability to tolerate low temperatures by planting early.

We can also use that ability to plant late. The mature plant tolerates the low temperatures of fall, there is no risk of bolting, and many people believe many of these crops taste superior after exposure to frost.

Those of us who sow in early spring and hope the soil has warmed enough to initiate germination are ready for a percentage of our seeds to never grow. Those of us who sow in late summer are pleased that the warm soil provides speedy germination with little seed loss.

Early seed and plant care is different when you plant late. In spring there is less need for extra watering; lower temperatures mean less evaporation and there is always a chance of rain or late snow. In summer, the heat requires more gardener attention to maintaining moist soil conditions for seeds and young plants; you may need to mist or water the plants two or three times a day in harsh sun.

Temperatures above 80F (27C) will cause broccoli and spinach to bolt quickly. Sowing in a shady spot or setting up a row cover can reduce this concern.

Once the plants have a few sets of leaves the need for watering becomes less than in late summer. While early plants need more water to combat the increasing summer heat, later plants require less water as the decreasing temperatures bring comfort. The plants are less stressed in fall. They grow in the conditions they like best; they're called cool season plants for a reason.

As long as the day temperatures remain about 10 to 15 degrees above freezing (40F - 50F, 4C - 10C) you can expect the crops to continue growing and producing. When the day temps remain below 40F (4C) the plants may begin to suffer. Careful harvesting will still produce results. The center of the plant may still have new, tasty leaves while the exterior leaves look frazzled.

Hard freezes, cold days, and icy conditions will adversely affect most cool season crops and will spell the end for your second harvest, but you can delay winter by mulching heavily with straw and using a season extender like cold frames, cloches, or plastic tunnels. I use my hoophouse system to harvest well into November and even December.

Broccoli and beets ready for overnight protection

Some crops like cabbage, kale, and spinach can do well, even in snow. With heavy mulching, beets, leeks, and parsnips can often be overwintered and harvested in spring (I've done this). 

Use your entire vegetable garden for fall planting. If you have a cool-season spring bed for broccoli, spinach, or lettuce and then let that bed remain filled with bolty, straggly, dried plants throughout the summer, rip those plants out and sow again for a fall crop.

Your tomatoes, peppers, and melons will decline in cooling weather. Anticipate their decline and sow seeds among those plants, in the same beds. When the first frost zaps your tomato plant, cut it out and let the cabbage and broccoli growing nearby overtake that space.

Root crops won't be as big as spring plantings, but may be tastier. Try growing small, thumb-sized carrot varieties or harvest them young before the ground freezes. Beet roots will be harvested when they're just a few inches big, but the beet leaves can be harvested continually.

Beet leaves are edible and tasty

Garden pests can be less of a concern for a fall garden. Many insect pests are less active, if not gone, in fall. The weeds will spend all summer attacking aren't active in fall. Even deer seem to be scarce as they make their way to find a winter bed.

While growing a second crop in the same season sounds like extra work, it doesn't need to be. Summer garden beds should be cleaned up before winter so insects don't have a place to overwinter. That clean up works well to prepare the beds for fall crops.

You'll spend a few more days in the garden watering and harvesting, but is that really a bad thing? Fall gardening allows you to do more of what you like and for me that's a good thing.

Link to "
Extending Your Growing Season with Mini Greenhouses"

Wednesday, February 13, 2013

Starting a New Garden

Dreaming of, planning, and building a garden are my favorite aspects of gardening. I like selecting plants, tending to them, and enjoying the fruits of my labors, but it's the actual garden development and construction that gives me the most satisfaction. Standing quietly, looking at a bare spot for hours or days, and envisioning the potential that lies in the soil offers me a true connection with the process of creation, growth, and fulfillment.

Many flower, grass, and xeriscape beds have adorned my landscape over the years and planning the steps through completion have evolved with each of them. Staking out a space and bringing it to bloom is fascinating, but it is in the development of vegetable gardens that my true gardening spirit soars.

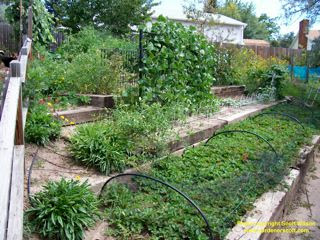
I've enjoyed the effort and success of two major vegetable gardens. One began as a rock-covered slope that evolved into a productive, terraced, lush and verdant space. Over the course of eight years it progressed from barren, sandy soil to an amalgam of beneficial amendments producing healthy plants in a challenging environment.

The gardening site in the beginning

The finished garden

The second garden began as a sun-baked patch of prairie sod and evolved into a deer-resistant, biochar-infused, raised-bed nirvana at 7,500 feet elevation. Three years of labor have just begun to lay the foundation for future growth.

The starting point

A transformed space

Now I have the opportunity to birth a third vegetable garden. Last week we closed the contract on a house back in the city of Colorado Springs and will begin the move in a few months. The new garden spot will be a full 1,000 feet lower in elevation and grant me two to four extra weeks in the growing season. It too has deer and a new challenge, rabbits.

A bunny in the front yard

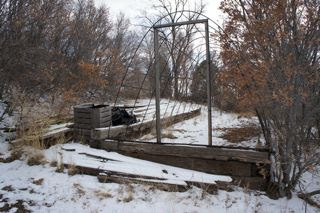
A previous resident had a good-sized vegetable garden there many years ago, but it is overgrown and in great need of repair. A rusting iron skeleton of hoops cover a large bed that will soon support a plastic cover protecting the plants beneath. The basics are there, and it offers great potential.

The forgotten garden

Huge stands of scrub oak cover the lot in intertwining masses. Dying, spindly pines and harshly-hacked junipers fill forgotten spaces. Ignored lawns are now nothing but eroding dirt. Supposedly-decorative rock smothers large spans of abused soil. It is a perfect gardening palette and I'm thrilled for the opportunity to create a beautiful landscape.

Already I've spent long minutes standing, observing, and imagining. The ground is currently frozen, but the process of clearing the brush, cutting straggly trees, and terracing the slopes will start soon. As soon as the soil is warm enough to work, amending and improving begin.

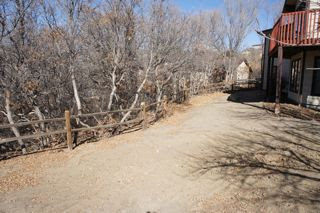
The barren back yard

As with past gardens, I'll document each step. I'll discuss the missteps and successes. I expect to make mistakes along the way, but also to learn many new things. On these pages, photos and words will share my thoughts and spread my knowledge.

This will be my biggest gardening undertaking to date. An entire landscape screams to be transformed. In the vegetable garden the positive transformation may be quickest to observe, but it won't be the only space encountering a new life. This effort will be years in the making and I anticipate the results with joy.

Join me as the adventure begins.
Dreaming of, planning, and building a garden are my favorite aspects of gardening. I like selecting plants, tending to them, and enjoying the fruits of my labors, but it's the actual garden development and construction that gives me the most satisfaction. Standing quietly, looking at a bare spot for hours or days, and envisioning the potential that lies in the soil offers me a true connection with the process of creation, growth, and fulfillment.

Many flower, grass, and xeriscape beds have adorned my landscape over the years and planning the steps through completion have evolved with each of them. Staking out a space and bringing it to bloom is fascinating, but it is in the development of vegetable gardens that my true gardening spirit soars.

I've enjoyed the effort and success of two major vegetable gardens. One began as a rock-covered slope that evolved into a productive, terraced, lush and verdant space. Over the course of eight years it progressed from barren, sandy soil to an amalgam of beneficial amendments producing healthy plants in a challenging environment.

The gardening site in the beginning

The finished garden

The second garden began as a sun-baked patch of prairie sod and evolved into a deer-resistant, biochar-infused, raised-bed nirvana at 7,500 feet elevation. Three years of labor have just begun to lay the foundation for future growth.

The starting point

A transformed space

Now I have the opportunity to birth a third vegetable garden. Last week we closed the contract on a house back in the city of Colorado Springs and will begin the move in a few months. The new garden spot will be a full 1,000 feet lower in elevation and grant me two to four extra weeks in the growing season. It too has deer and a new challenge, rabbits.

A bunny in the front yard

A previous resident had a good-sized vegetable garden there many years ago, but it is overgrown and in great need of repair. A rusting iron skeleton of hoops cover a large bed that will soon support a plastic cover protecting the plants beneath. The basics are there, and it offers great potential.

The forgotten garden

Huge stands of scrub oak cover the lot in intertwining masses. Dying, spindly pines and harshly-hacked junipers fill forgotten spaces. Ignored lawns are now nothing but eroding dirt. Supposedly-decorative rock smothers large spans of abused soil. It is a perfect gardening palette and I'm thrilled for the opportunity to create a beautiful landscape.

Already I've spent long minutes standing, observing, and imagining. The ground is currently frozen, but the process of clearing the brush, cutting straggly trees, and terracing the slopes will start soon. As soon as the soil is warm enough to work, amending and improving begin.

The barren back yard

As with past gardens, I'll document each step. I'll discuss the missteps and successes. I expect to make mistakes along the way, but also to learn many new things. On these pages, photos and words will share my thoughts and spread my knowledge.

This will be my biggest gardening undertaking to date. An entire landscape screams to be transformed. In the vegetable garden the positive transformation may be quickest to observe, but it won't be the only space encountering a new life. This effort will be years in the making and I anticipate the results with joy.

Join me as the adventure begins.

Saturday, May 7, 2011

Wall O'Water, Aqui-Shield, and Other Season Extenders

Wall O'Water revolutionized gardening several years ago. The plastic, tubular, plant protection system allows gardeners to plant warm season plants like tomatoes, peppers, and eggplants several weeks earlier than usual. With the success of the product, other gardening companies followed suit and there are imitators available. Burpee offers their own product called Aqua-Shield. You can find similar, generic products at home centers and nurseries.

The concept is simple: surround plants with a wall of water that collects sun energy during the day and releases it at night, protecting the plant from cold temperatures. It's like a mini greenhouse with extra insulation.

Wall O'Water advertises that you can plant six to eight weeks early, without fear of freezing. Burpee suggests using Aqui-Shield up to one month early. As efficient a system as it is, I feel more comfortable with the one-month guideline.

You begin by planting your plant normally. Tomatoes prefer a soil temperature of at least 60F degrees. Below 50F degrees and roots won't grow. If your soil hasn't warmed sufficiently, cover the bed with plastic for a few days to help raise the soil temperature.

Plastic warming the soil

After the plant is in the ground, cover it with a five-gallon bucket. This is the support you need for the plastic. Don't try to fill the tubes with water without a bucket in place. You'll make a mess, probably break your plant, and waste a lot of effort.

Covering the plant

Arrange the plastic season extender around the bucket. It doesn't need to be perfect, just try to space it as evenly as you can. Fill each of the tubes about two-thirds full with water. I recommend using a hand-controlled hose nozzle. You can just let the hose run free while you fill the tubes, but it will create a mess. Control is better.

Filling the plastic tubes

With water in each tube, carefully remove the bucket, making sure you don't snag or injure your plant.

Removing the bucket

The tubes will collapse at the top, forming a teepee. This is the key to early season protection. The plant is full enclosed by the plastic and water and the temperature inside stays nice and toasty, just what the warm season plants like.

The finished teepee

In a few weeks you can expect the plant to start peaking through the top of the teepee. Average day and night temperatures will be warmer and you won't need full enclosure of the plant. At this point, fill each of the tubes to the top with water. The extra water will expand the plastic and create a cylinder with the top open. The plant will be able to grow through. You may need to add water every few days to keep them filled.

You still need to water the plant too, though it shouldn't be as often as other unprotected plants. The plastic teepee will help keep the moisture levels of air and soil higher. Don't assume the plant is doing okay with this protection. Check the condition of the plant and of the soil moisture regularly.

Watering through the top

After all danger of frost is past, at least two or three weeks after the last frost date, it's time to remove the season extender. This can be a little tricky because you have a great deal of water in the tubes and the plant is almost certainly growing out the top. I recommend laying a mulch like straw around the base of the plastic and squeezing the tubes to try and push out as much water as you can. This helps avoid a muddy mess. As carefully as you can, without breaking or injuring the plant, slide the plastic up and over the plant.

With the plastic system off and out of the way, drain the water out and lay it in a place where it can dry out completely. You'll be able to reuse it for years, but you don't want to put it in storage if there is still water in it; mold will definitely develop. If you are impatient and it's not drying quick enough, you can try using a blow dryer on the cool setting to blow air into the tubes.

These season extenders definitely work. In conjunction with a mini-greenhouse hoop system like I showed in my blog, "Extending Your Growing Season with Mini Greenhouses", I think you could plant six to eight weeks early as long as the soil temperature is warm enough when you first plant. Especially in very cold regions with short growing seasons, these extenders will allow you to grow plants you might not be able to grow otherwise.

At a cost of between four and five dollars each, they're affordable and considering that they can be reused for years, you're investing an extra dollar or so on each plant. The extended season that you gain should more than repay that investment with additional produce.

Wall O'Water revolutionized gardening several years ago. The plastic, tubular, plant protection system allows gardeners to plant warm season plants like tomatoes, peppers, and eggplants several weeks earlier than usual. With the success of the product, other gardening companies followed suit and there are imitators available. Burpee offers their own product called Aqua-Shield. You can find similar, generic products at home centers and nurseries.

The concept is simple: surround plants with a wall of water that collects sun energy during the day and releases it at night, protecting the plant from cold temperatures. It's like a mini greenhouse with extra insulation.

Wall O'Water advertises that you can plant six to eight weeks early, without fear of freezing. Burpee suggests using Aqui-Shield up to one month early. As efficient a system as it is, I feel more comfortable with the one-month guideline.

You begin by planting your plant normally. Tomatoes prefer a soil temperature of at least 60F degrees. Below 50F degrees and roots won't grow. If your soil hasn't warmed sufficiently, cover the bed with plastic for a few days to help raise the soil temperature.

Plastic warming the soil

After the plant is in the ground, cover it with a five-gallon bucket. This is the support you need for the plastic. Don't try to fill the tubes with water without a bucket in place. You'll make a mess, probably break your plant, and waste a lot of effort.

Covering the plant

Arrange the plastic season extender around the bucket. It doesn't need to be perfect, just try to space it as evenly as you can. Fill each of the tubes about two-thirds full with water. I recommend using a hand-controlled hose nozzle. You can just let the hose run free while you fill the tubes, but it will create a mess. Control is better.

Filling the plastic tubes

With water in each tube, carefully remove the bucket, making sure you don't snag or injure your plant.

Removing the bucket

The tubes will collapse at the top, forming a teepee. This is the key to early season protection. The plant is full enclosed by the plastic and water and the temperature inside stays nice and toasty, just what the warm season plants like.

The finished teepee

In a few weeks you can expect the plant to start peaking through the top of the teepee. Average day and night temperatures will be warmer and you won't need full enclosure of the plant. At this point, fill each of the tubes to the top with water. The extra water will expand the plastic and create a cylinder with the top open. The plant will be able to grow through. You may need to add water every few days to keep them filled.

You still need to water the plant too, though it shouldn't be as often as other unprotected plants. The plastic teepee will help keep the moisture levels of air and soil higher. Don't assume the plant is doing okay with this protection. Check the condition of the plant and of the soil moisture regularly.

Watering through the top

After all danger of frost is past, at least two or three weeks after the last frost date, it's time to remove the season extender. This can be a little tricky because you have a great deal of water in the tubes and the plant is almost certainly growing out the top. I recommend laying a mulch like straw around the base of the plastic and squeezing the tubes to try and push out as much water as you can. This helps avoid a muddy mess. As carefully as you can, without breaking or injuring the plant, slide the plastic up and over the plant.

With the plastic system off and out of the way, drain the water out and lay it in a place where it can dry out completely. You'll be able to reuse it for years, but you don't want to put it in storage if there is still water in it; mold will definitely develop. If you are impatient and it's not drying quick enough, you can try using a blow dryer on the cool setting to blow air into the tubes.

These season extenders definitely work. In conjunction with a mini-greenhouse hoop system like I showed in my blog, "Extending Your Growing Season with Mini Greenhouses", I think you could plant six to eight weeks early as long as the soil temperature is warm enough when you first plant. Especially in very cold regions with short growing seasons, these extenders will allow you to grow plants you might not be able to grow otherwise.

At a cost of between four and five dollars each, they're affordable and considering that they can be reused for years, you're investing an extra dollar or so on each plant. The extended season that you gain should more than repay that investment with additional produce.

Wednesday, March 2, 2011

Extending Your Growing Season with Mini Greenhouses

Gaining a few extra weeks in your growing season might make the difference between harvesting a handful of tomatoes and harvesting a bushel. With a little effort and not much money, you can add weeks to your season on both the front side and the back.

I strongly advocate raised beds if you want an extended season. The soil in raised beds thaws out faster in the spring. After a few recent warm days I tested my soil yesterday. The soil in open areas that receive full sun is still frozen below about two inches. The soil in my raised beds is thawed down to six to eight inches, depending on how much sun they get. Raised beds are also ideal for mini greenhouses.

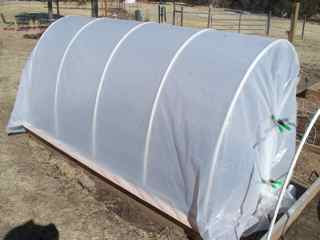
A mini greenhouse over my raised bed.

A mini green house is a simple structure that is built over the raised bed, or in the garden, and covered with plastic. It lets the sun's rays through during the day and traps radiant heat at night.

Mini greenhouses will warm the soil faster, help retain heat through the night, and protect plants during the variable days of late spring. The last two to three weeks before your last frost date (see my blog "Know Your Important Garden Dates";  Jan 20, 2011) may still present a few nights where the temperatures drop below freezing. The extra protection makes a big difference; studies by Colorado State University showed a plastic-covered frame provided three to six degrees of frost protection. That's all you need to plant early and not be worried.

I built my mini greenhouses as "hoop houses" using 1/2" PVC pipe. In my four feet by eight feet raised beds, I installed 3/4" pipe "C" clamps every two feet along the side edges of the bed. Take a 10-feet long PVC pipe and bend it between the clamps. This forms a hoop. An eight-foot long, 1" x 2" board can be screwed to the hoops at the top center to form a backbone that holds them in place.

The clamps that hold the PVC pipe in place.

Cover the hoops with a sheet of plastic. Plastic that is 10-feet wide is a perfect fit for the hoops. You want to trim it long enough to fully cover the ends of the mini greenhouse. For an eight-feet long bed, plan your plastic to be at least 14 feet long; that allows an extra three feet on each end that can be folded around to cover the end. I used 16-feet long strips to completely enclose the beds.

I used spring hand clamps at the ends to hold the plastic ends together. If you want the ends to be open for air flow, you can also use clamps to hold the plastic to the hoops or to the raised bed. To help keep the plastic in place during windy conditions, I stapled eight-feet long, 1" x 3" tacking strips to the center sides of the plastic; they hang at the sides of the bed.

Spring clamps holding the plastic together.

My mini greenhouses are in place now to warm the soil. As soon as the soil is completely thawed I can start planting cool season plants like peas and lettuce. We'll still have nights below freezing through April, but the extra protection should avoid serious plant damage. To plant, you just slide the plastic off one side; you can clamp it at the top. You can also plant and water from each end without removing the plastic sheet.

If you use ten-feet long PVC pipe, your hoops will be about four feet tall. That should be big enough for most garden plants that need early and late protection. If you want a shorter mini greenhouse, eight-feet long pipe will make hoops about three feet tall.

Two different sizes of hoops.

When the days begin to get hot, you'll need to be sure to open the ends of the mini greenhouse when the sun is out. This helps ensure air flow and will keep young plants from frying. Close the ends before the sun goes down to retain the warmth in the soil.

The mini greenhouses should stay covered with plastic until the nights remain warm enough for the plants under the hoops. You can leave the plastic in place throughout the growing season, but it may create too much heat for the plants and can reduce pollination. I remove the plastic in early June when the days and nights are consistently warm. If hail is in the forecast I can quickly bring the plastic out and cover the hoops to prevent plant damage.

If you've matched the size of the plant to the size of the hoop, you can put the plastic back on to extend the growing season on the backside. In late summer and early fall, the mini greenhouses keep the temperatures warm when the nights begin to cool. You should be able to coast through your first frost with the plants protected and buy another couple weeks of harvest.

The total cost for each mini greenhouse was about $20 with supplies from a garden center. The PVC and plastic will gradually break down in the sun, but should last at least two full seasons. That seems to be a good investment for getting much more produce from the garden.

You can see a quick recap of the entire process on this YouTube video I made. Enjoy extending your growing season.

"How to Build a Hoophouse Mini Greenhouse" with Gardener Scott
Gaining a few extra weeks in your growing season might make the difference between harvesting a handful of tomatoes and harvesting a bushel. With a little effort and not much money, you can add weeks to your season on both the front side and the back.

I strongly advocate raised beds if you want an extended season. The soil in raised beds thaws out faster in the spring. After a few recent warm days I tested my soil yesterday. The soil in open areas that receive full sun is still frozen below about two inches. The soil in my raised beds is thawed down to six to eight inches, depending on how much sun they get. Raised beds are also ideal for mini greenhouses.

A mini greenhouse over my raised bed.

A mini green house is a simple structure that is built over the raised bed, or in the garden, and covered with plastic. It lets the sun's rays through during the day and traps radiant heat at night.

Mini greenhouses will warm the soil faster, help retain heat through the night, and protect plants during the variable days of late spring. The last two to three weeks before your last frost date (see my blog "
Know Your Important Garden Dates";  Jan 20, 2011) may still present a few nights where the temperatures drop below freezing. The extra protection makes a big difference; studies by Colorado State University showed a plastic-covered frame provided three to six degrees of frost protection. That's all you need to plant early and not be worried.

I built my mini greenhouses as "hoop houses" using 1/2" PVC pipe. In my four feet by eight feet raised beds, I installed 3/4" pipe "C" clamps every two feet along the side edges of the bed. Take a 10-feet long PVC pipe and bend it between the clamps. This forms a hoop. An eight-foot long, 1" x 2" board can be screwed to the hoops at the top center to form a backbone that holds them in place.

The clamps that hold the PVC pipe in place.

Cover the hoops with a sheet of plastic. Plastic that is 10-feet wide is a perfect fit for the hoops. You want to trim it long enough to fully cover the ends of the mini greenhouse. For an eight-feet long bed, plan your plastic to be at least 14 feet long; that allows an extra three feet on each end that can be folded around to cover the end. I used 16-feet long strips to completely enclose the beds.

I used spring hand clamps at the ends to hold the plastic ends together. If you want the ends to be open for air flow, you can also use clamps to hold the plastic to the hoops or to the raised bed. To help keep the plastic in place during windy conditions, I stapled eight-feet long, 1" x 3" tacking strips to the center sides of the plastic; they hang at the sides of the bed.

Spring clamps holding the plastic together.

My mini greenhouses are in place now to warm the soil. As soon as the soil is completely thawed I can start planting cool season plants like peas and lettuce. We'll still have nights below freezing through April, but the extra protection should avoid serious plant damage. To plant, you just slide the plastic off one side; you can clamp it at the top. You can also plant and water from each end without removing the plastic sheet.

If you use ten-feet long PVC pipe, your hoops will be about four feet tall. That should be big enough for most garden plants that need early and late protection. If you want a shorter mini greenhouse, eight-feet long pipe will make hoops about three feet tall.

Two different sizes of hoops.

When the days begin to get hot, you'll need to be sure to open the ends of the mini greenhouse when the sun is out. This helps ensure air flow and will keep young plants from frying. Close the ends before the sun goes down to retain the warmth in the soil.

The mini greenhouses should stay covered with plastic until the nights remain warm enough for the plants under the hoops. You can leave the plastic in place throughout the growing season, but it may create too much heat for the plants and can reduce pollination. I remove the plastic in early June when the days and nights are consistently warm. If hail is in the forecast I can quickly bring the plastic out and cover the hoops to prevent plant damage.

If you've matched the size of the plant to the size of the hoop, you can put the plastic back on to extend the growing season on the backside. In late summer and early fall, the mini greenhouses keep the temperatures warm when the nights begin to cool. You should be able to coast through your first frost with the plants protected and buy another couple weeks of harvest.

The total cost for each mini greenhouse was about $20 with supplies from a garden center. The PVC and plastic will gradually break down in the sun, but should last at least two full seasons. That seems to be a good investment for getting much more produce from the garden.

You can see a quick recap of the entire process on this YouTube video I made. Enjoy extending your growing season.

"How to Build a Hoophouse Mini Greenhouse" with Gardener Scott