Seed tapes are strips of paper that have seeds embedded along their length at specific spacing, appropriate for precise planting. You can buy them in many gardening or seed catalogs and at many nurseries. Because the seeds are neatly laid out on the paper strip, all you have to do is place the tape in a furrow, cover it with soil, and water it like any other seed. It's an easy way to ensure your seeds go where you want them, with the spacing they require, and at a consistent depth.
Seed tapes are wonderful for plants that have specific planting distance requirements like beets, carrots, radishes, and onions. Planted and grown too close together, these vegetables can become stunted or misshapen. They're great for plants like lettuce, spinach, and chard that also have spacing needs. Seed tapes are designed to provide the necessary spacing with no need for thinning.
One of my favorite catalogs,
Gardener's Supply Company, offers a number of effort-saving gardening tools and supplies. They sell three, five-and-a-half-feet long seed tapes for about five dollars (US). That's enough to plant two rows in a typical eight-feet-long planting bed. Assuming an average spacing of about three inches per seed, you should get about 70 plants per package. However, the selection of seed varieties is limited to just a few types.
If you're willing to spend the time and effort, you can make your own seed tape for a fraction of the cost, using recycled newspaper. You won't be limited by seed variety; you can choose any seed you like. And you can make them any length you desire.
Begin by cutting sheets of newspaper into strips about one-inch wide. The strips will be about two-feet long. You can use them at this length or paste or tape them together into longer strips like the ones that
Gardener's Supply Company sells.
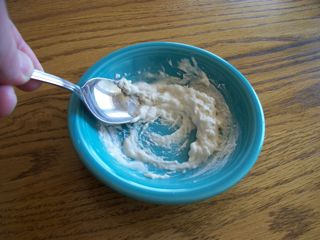
Take a tablespoon or two of white flour and mix it with an equal amount of water to make a smooth paste. Consistency isn't important; you just don't want it to be runny.


Using a toothpick, chopstick or similar-sized utensil, place small drops of the paste at regular intervals along the newspaper strip. The spacing you choose is dependent on the seed you've chosen. Check the seed packet for proper spacing.
Carefully drop a seed into each drop of paste. You can use the toothpick or utensil to gently push on the seed to embed it in the paste.
Label the strip so you know what seeds are on it. You can do this step before you place the paste if you want.
Set the strip in a location where it can dry for an hour or two without being disturbed.
When you're ready to plant, dig a furrow of the correct planting depth as stated on the seed packet and lay the strip in it. It isn't critical whether the newspaper is on the bottom or top because it won't hinder the growth of the seed when it's wet. I place it with the newspaper side down. Cover the strip with the appropriate depth of soil.
That's all there is to it. You now have a neat row of seeds ready to germinate and burst forth.
You can save a great deal of money by making seed tapes yourself. I purchased 250 beet seeds for $2.25, for an average cost of less than a penny per seed. The recycled newspaper and flour paste adds a few pennies to the overall project. Spacing them at three-inch intervals on a homemade seed tape, I can produce over 60 feet of beet seed tape for just over two dollars total cost. An equivalent length when purchased would be over $20.
Using seed tapes can be a good idea for very small seeds. When you sow on open soil, it can be difficult to see where the seeds land; you may miss the furrow completely. It can be tough getting the spacing right, so open sowing often requires using a lot of seeds and then thinning the plants because they end up too close together. Using seed tapes allows you to see exactly where the seeds are planted and ensures you have proper spacing, thereby limiting wasted seeds.
You usually don't need seed tapes for large seeds like squash, melon, and corn. For plants with large spacing requirements like tomatoes, cucumbers, or peppers, seed tapes aren't necessary either.
Seed tapes can be very useful for mid-season and successive planting without disturbing plants already in the ground. You can place a length of seed tape in between rows of other plants during the summer. As the initial plants are harvested, the new ones from the tape are beginning their growth. Many cool season seeds are planted at intervals so you have continuous harvest later on. Placing a new seed tape of radishes or lettuce at two-week intervals can give you a steady harvest with little effort.
If you haven't used seed tapes before, think about adding them to your bag of tricks. You can buy them or make them. Either way, they are a perfect, no-waste method of sowing seeds.
Seed tapes are strips of paper that have seeds embedded along their length at specific spacing, appropriate for precise planting. You can buy them in many gardening or seed catalogs and at many nurseries. Because the seeds are neatly laid out on the paper strip, all you have to do is place the tape in a furrow, cover it with soil, and water it like any other seed. It's an easy way to ensure your seeds go where you want them, with the spacing they require, and at a consistent depth.
Seed tapes are wonderful for plants that have specific planting distance requirements like beets, carrots, radishes, and onions. Planted and grown too close together, these vegetables can become stunted or misshapen. They're great for plants like lettuce, spinach, and chard that also have spacing needs. Seed tapes are designed to provide the necessary spacing with no need for thinning.
One of my favorite catalogs, Gardener's Supply Company, offers a number of effort-saving gardening tools and supplies. They sell three, five-and-a-half-feet long seed tapes for about five dollars (US). That's enough to plant two rows in a typical eight-feet-long planting bed. Assuming an average spacing of about three inches per seed, you should get about 70 plants per package. However, the selection of seed varieties is limited to just a few types.
If you're willing to spend the time and effort, you can make your own seed tape for a fraction of the cost, using recycled newspaper. You won't be limited by seed variety; you can choose any seed you like. And you can make them any length you desire.
Begin by cutting sheets of newspaper into strips about one-inch wide. The strips will be about two-feet long. You can use them at this length or paste or tape them together into longer strips like the ones that Gardener's Supply Company sells.
Take a tablespoon or two of white flour and mix it with an equal amount of water to make a smooth paste. Consistency isn't important; you just don't want it to be runny.
Using a toothpick, chopstick or similar-sized utensil, place small drops of the paste at regular intervals along the newspaper strip. The spacing you choose is dependent on the seed you've chosen. Check the seed packet for proper spacing.
Carefully drop a seed into each drop of paste. You can use the toothpick or utensil to gently push on the seed to embed it in the paste.
Label the strip so you know what seeds are on it. You can do this step before you place the paste if you want.
Set the strip in a location where it can dry for an hour or two without being disturbed.
When you're ready to plant, dig a furrow of the correct planting depth as stated on the seed packet and lay the strip in it. It isn't critical whether the newspaper is on the bottom or top because it won't hinder the growth of the seed when it's wet. I place it with the newspaper side down. Cover the strip with the appropriate depth of soil.
That's all there is to it. You now have a neat row of seeds ready to germinate and burst forth.
You can save a great deal of money by making seed tapes yourself. I purchased 250 beet seeds for $2.25, for an average cost of less than a penny per seed. The recycled newspaper and flour paste adds a few pennies to the overall project. Spacing them at three-inch intervals on a homemade seed tape, I can produce over 60 feet of beet seed tape for just over two dollars total cost. An equivalent length when purchased would be over $20.
Using seed tapes can be a good idea for very small seeds. When you sow on open soil, it can be difficult to see where the seeds land; you may miss the furrow completely. It can be tough getting the spacing right, so open sowing often requires using a lot of seeds and then thinning the plants because they end up too close together. Using seed tapes allows you to see exactly where the seeds are planted and ensures you have proper spacing, thereby limiting wasted seeds.
You usually don't need seed tapes for large seeds like squash, melon, and corn. For plants with large spacing requirements like tomatoes, cucumbers, or peppers, seed tapes aren't necessary either.
Seed tapes can be very useful for mid-season and successive planting without disturbing plants already in the ground. You can place a length of seed tape in between rows of other plants during the summer. As the initial plants are harvested, the new ones from the tape are beginning their growth. Many cool season seeds are planted at intervals so you have continuous harvest later on. Placing a new seed tape of radishes or lettuce at two-week intervals can give you a steady harvest with little effort.
If you haven't used seed tapes before, think about adding them to your bag of tricks. You can buy them or make them. Either way, they are a perfect, no-waste method of sowing seeds.


No comments:
Post a Comment